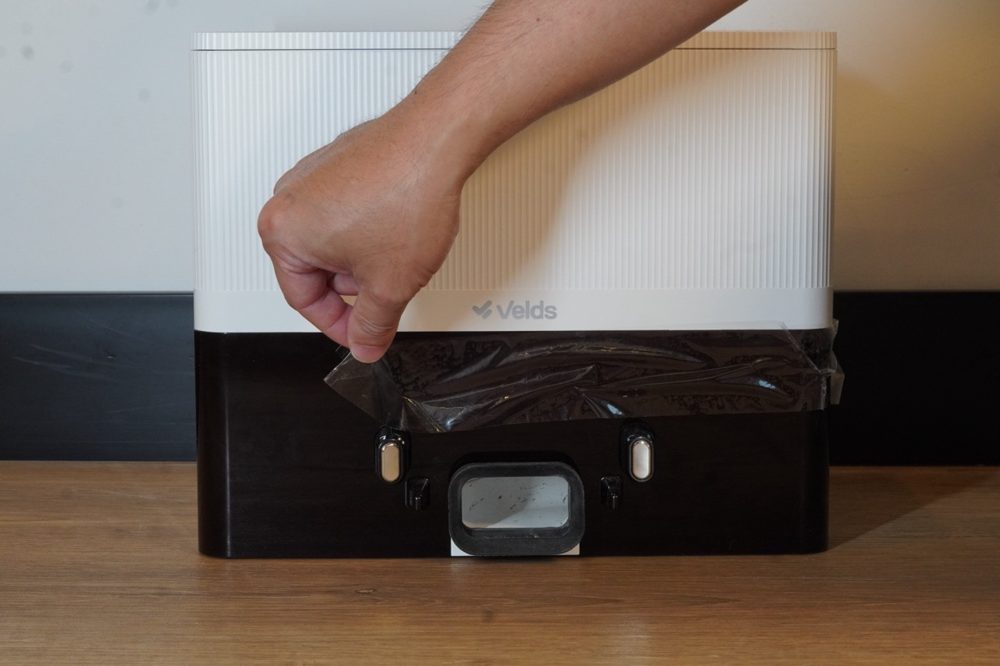
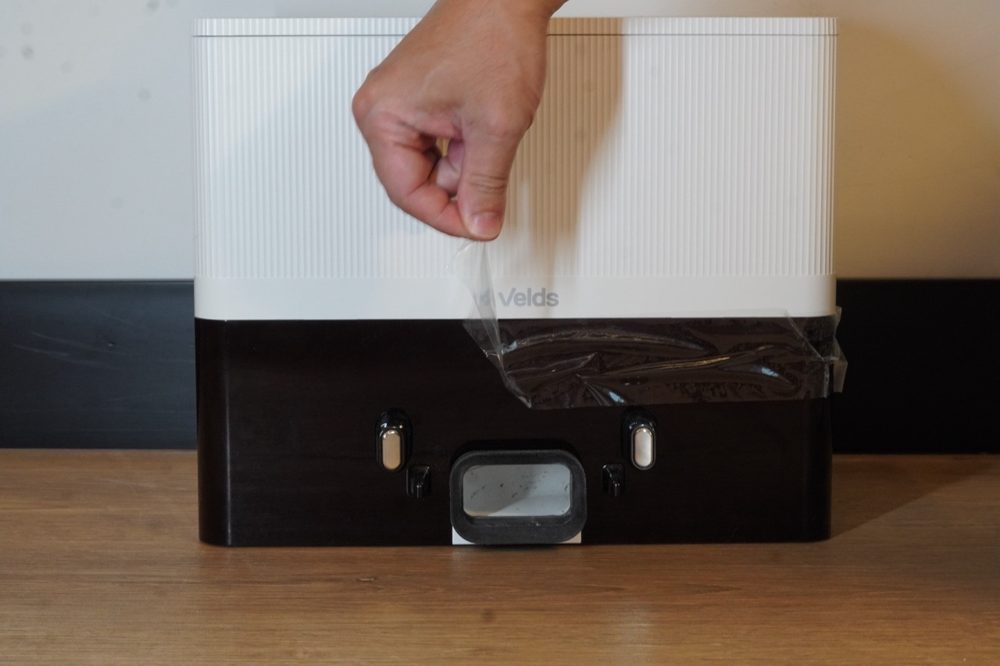
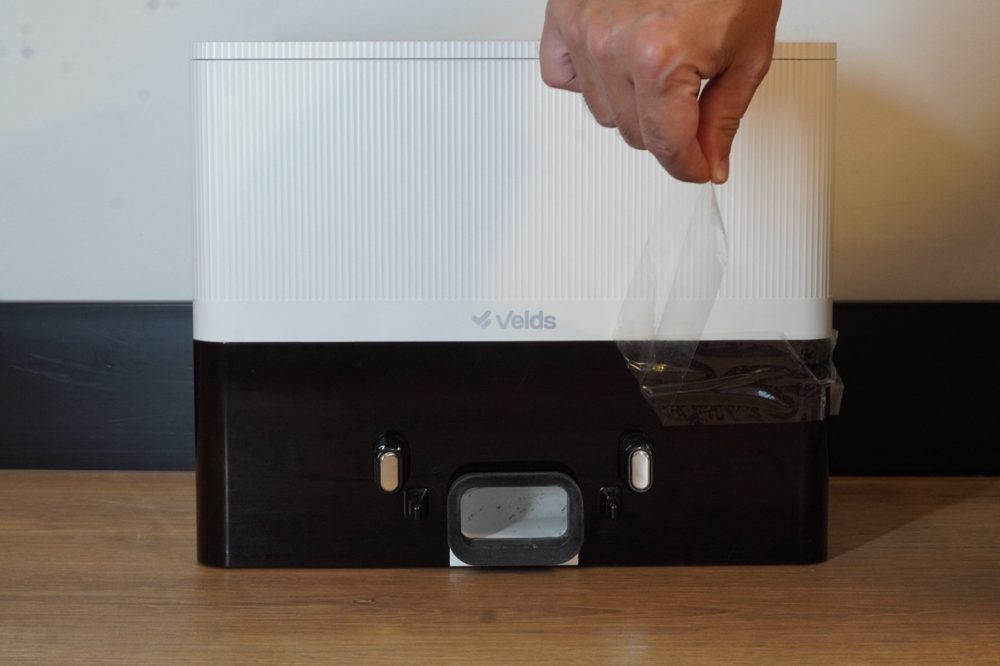
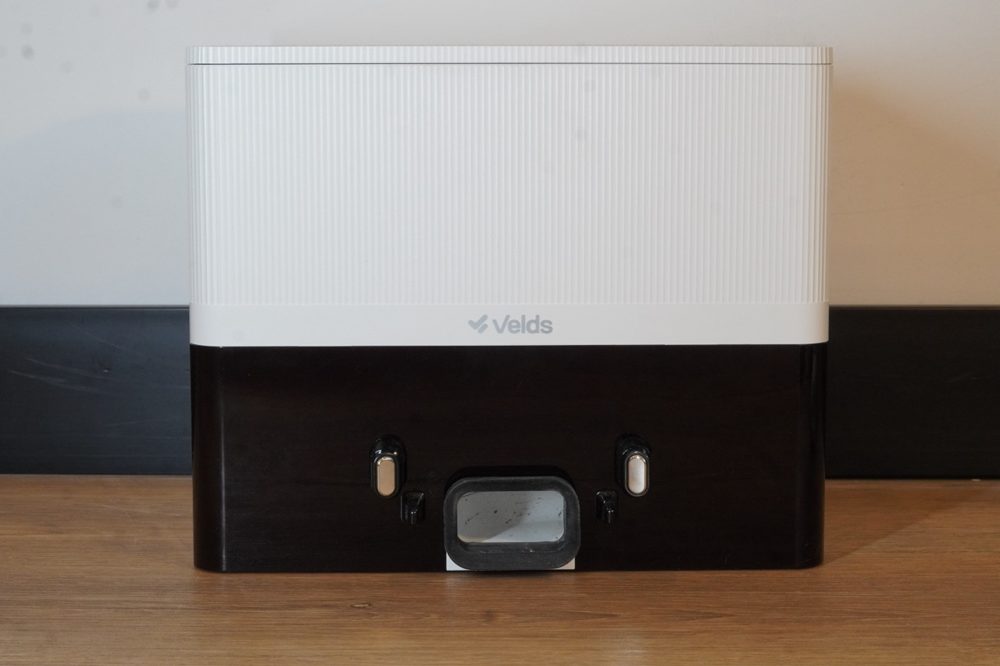
Pinch to zoom for details.
Velds V50 PRO robot vacuum
Quick Start Guide
Smart Robot Vacuum
V50 PRO

Everything you need to get started.

Simple, fast setup.

Smart cleaning, more time for you.

Read this guide before first use.
velds.us
01
What is in the box
Check the contents of your Velds V50 PRO before you start.

Before starting, remove all items from the box and check that the contents are complete.

If any item is missing or damaged, do not use the product and contact Velds support.
What is in the box
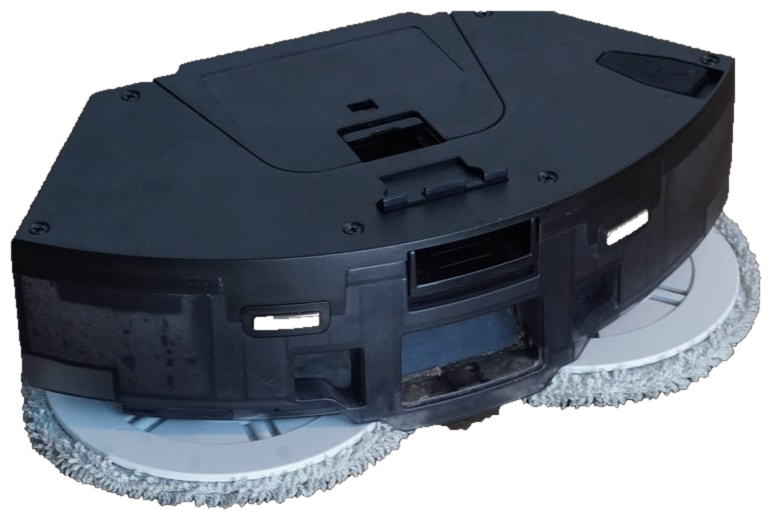
What is in the box - V50 PRO robot vacuum
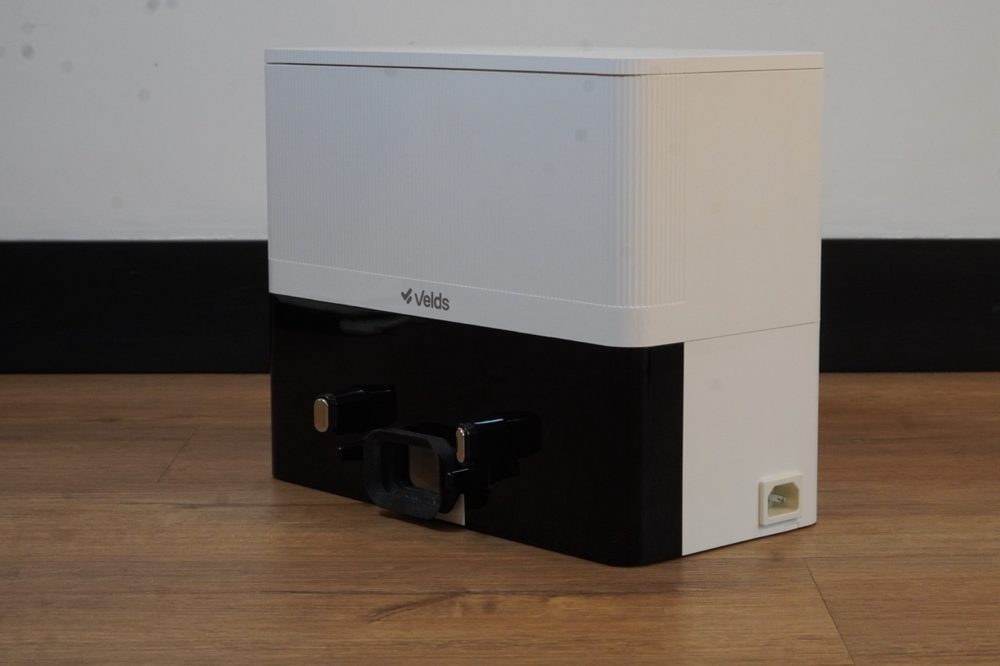
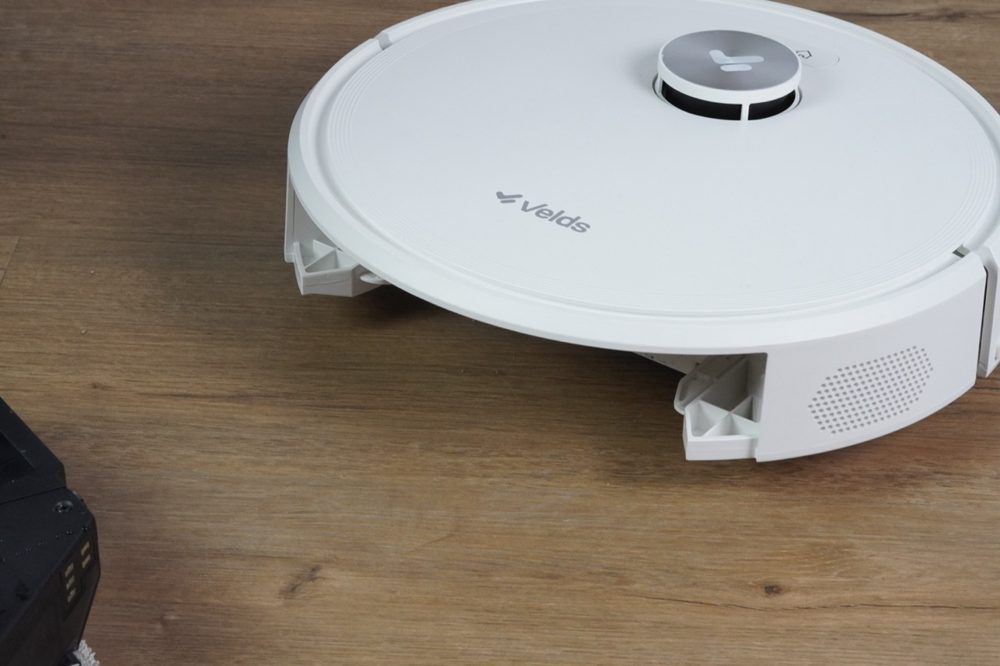
V50 PRO robot vacuum
Charging dock with dust box
Charging dock
with dust box
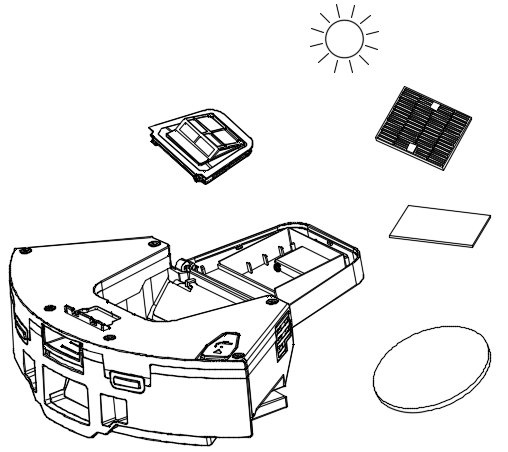
2-in-1 water and dust tank
2-in-1 water
and dust tank
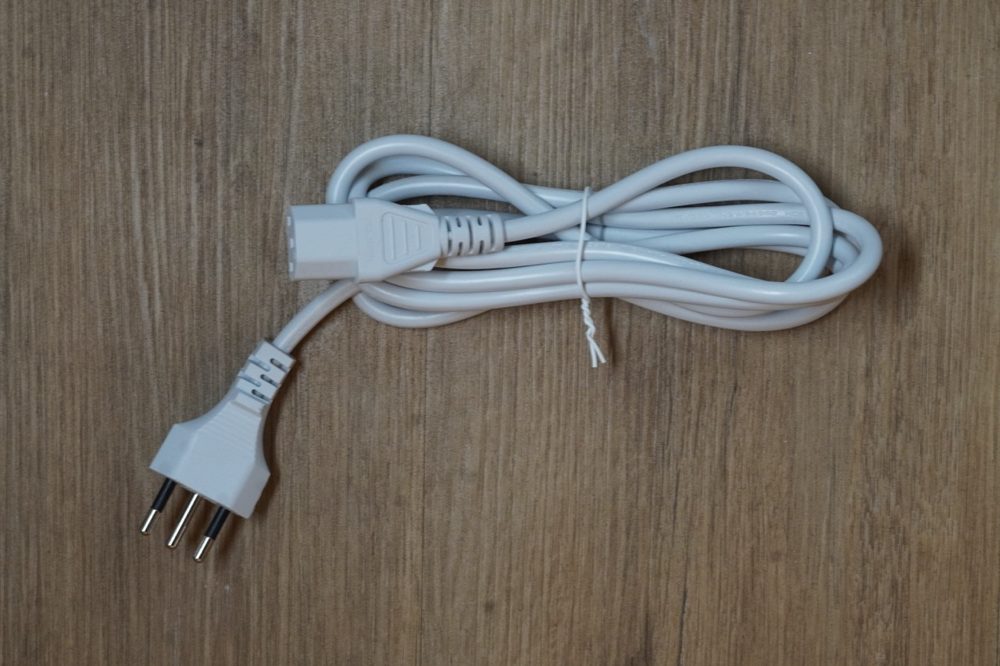
What is in the box - Type N power cord
Type N power cord
Brazil outlets · 110V
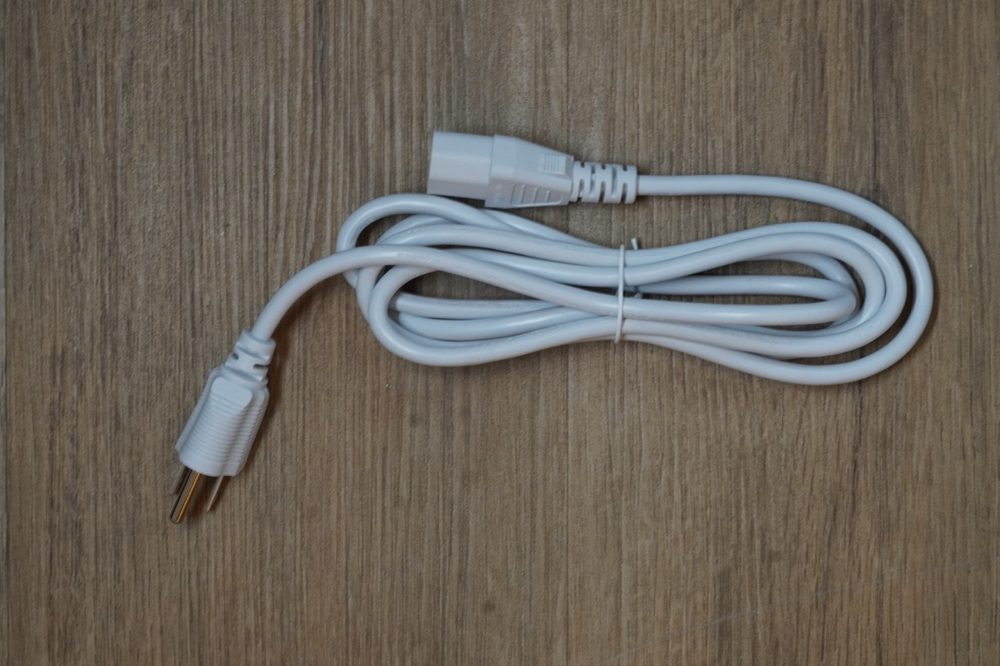
What is in the box - Type B power cord
Type B power cord
US outlets · 110V
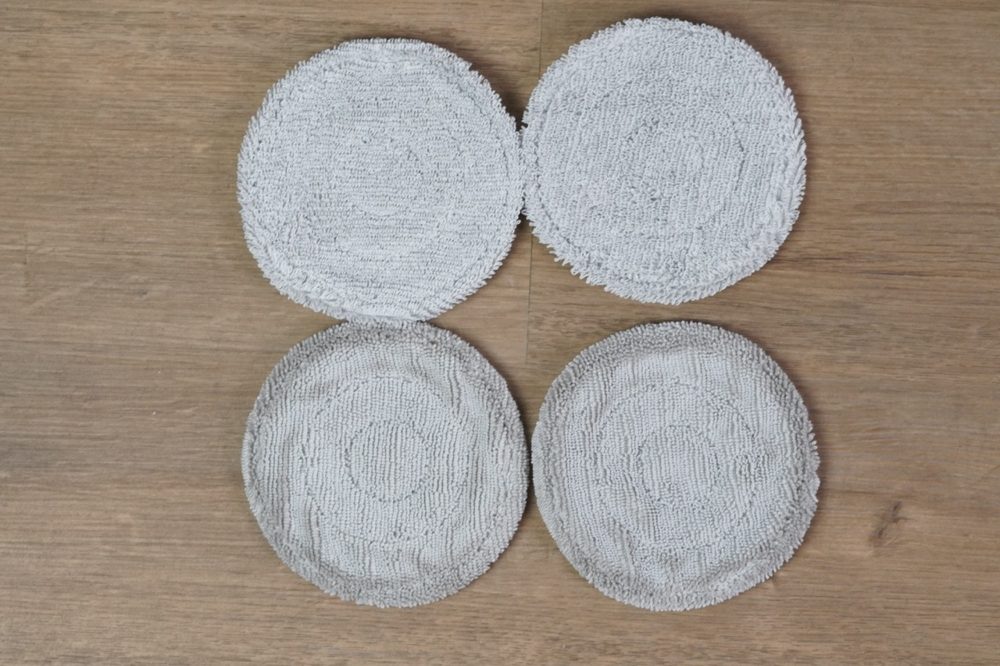
What is in the box - 4 spinning mop pads
4 spinning mop pads
2 to install and 2 spare
What is in the box - 4 side brushes
4 side brushes
2 to install and 2 spare
What is in the box - Main brush
Main brush
What is in the box - 2 HEPA filters
2 HEPA filters
What is in the box - 2 sponges
2 sponges
foam pre-filter
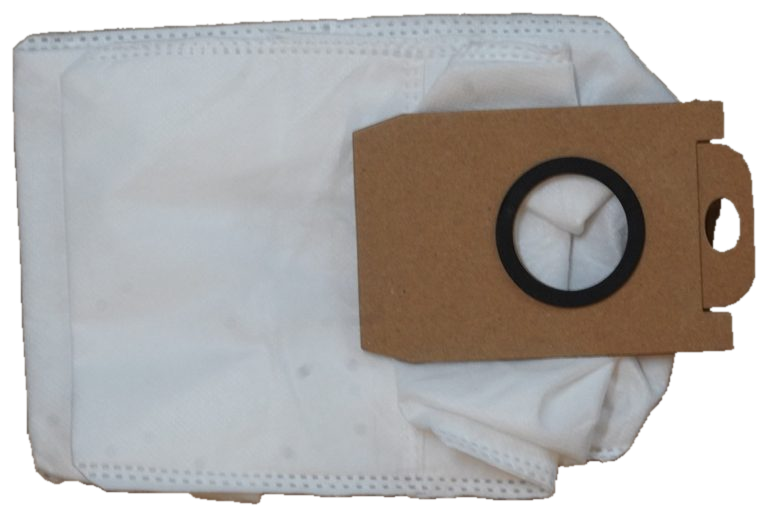
What is in the box - 2 dust bags
2 dust bags
What is in the box - Cleaning tool
Cleaning tool
What is in the box - Quick Start Guide
Quick Start Guide
Velds V50 PRO | Quick Start Guide
02
Technical specifications
General information about the V50 PRO.
ModelV50 PRO
Wireless connectivityWi-Fi 2.4GHz + Bluetooth LE
Voltage110V
Power consumption50W
Internal battery3,200 mAh
Cleaning time (Eco)up to 90 minutes
Cleaning time (Max)up to 50 minutes
Suction power10,000 Pa
Noise level<75dB
Water tank270ml
Dust capacity300ml
V50 PRO weight3.145 kg
Dock weight2.677 kg
Supported platformsAndroid / iOS
Technical specifications - V50 PRO robot vacuum
V50 PRO robot vacuum
350 x 350 x 103 mm
Technical specifications - Charging dock
Charging dock
310 x 252 x 184 mm
2-in-1 water and dust tank
270 ml water · 300 ml dust
Reset
Press and hold the Home button for a few seconds to reset the device’s Wi-Fi settings.
Tip
Keep this guide for future reference. The full online manual, spare parts and support are available at velds.us.
Velds V50 PRO | Quick Start Guide
03
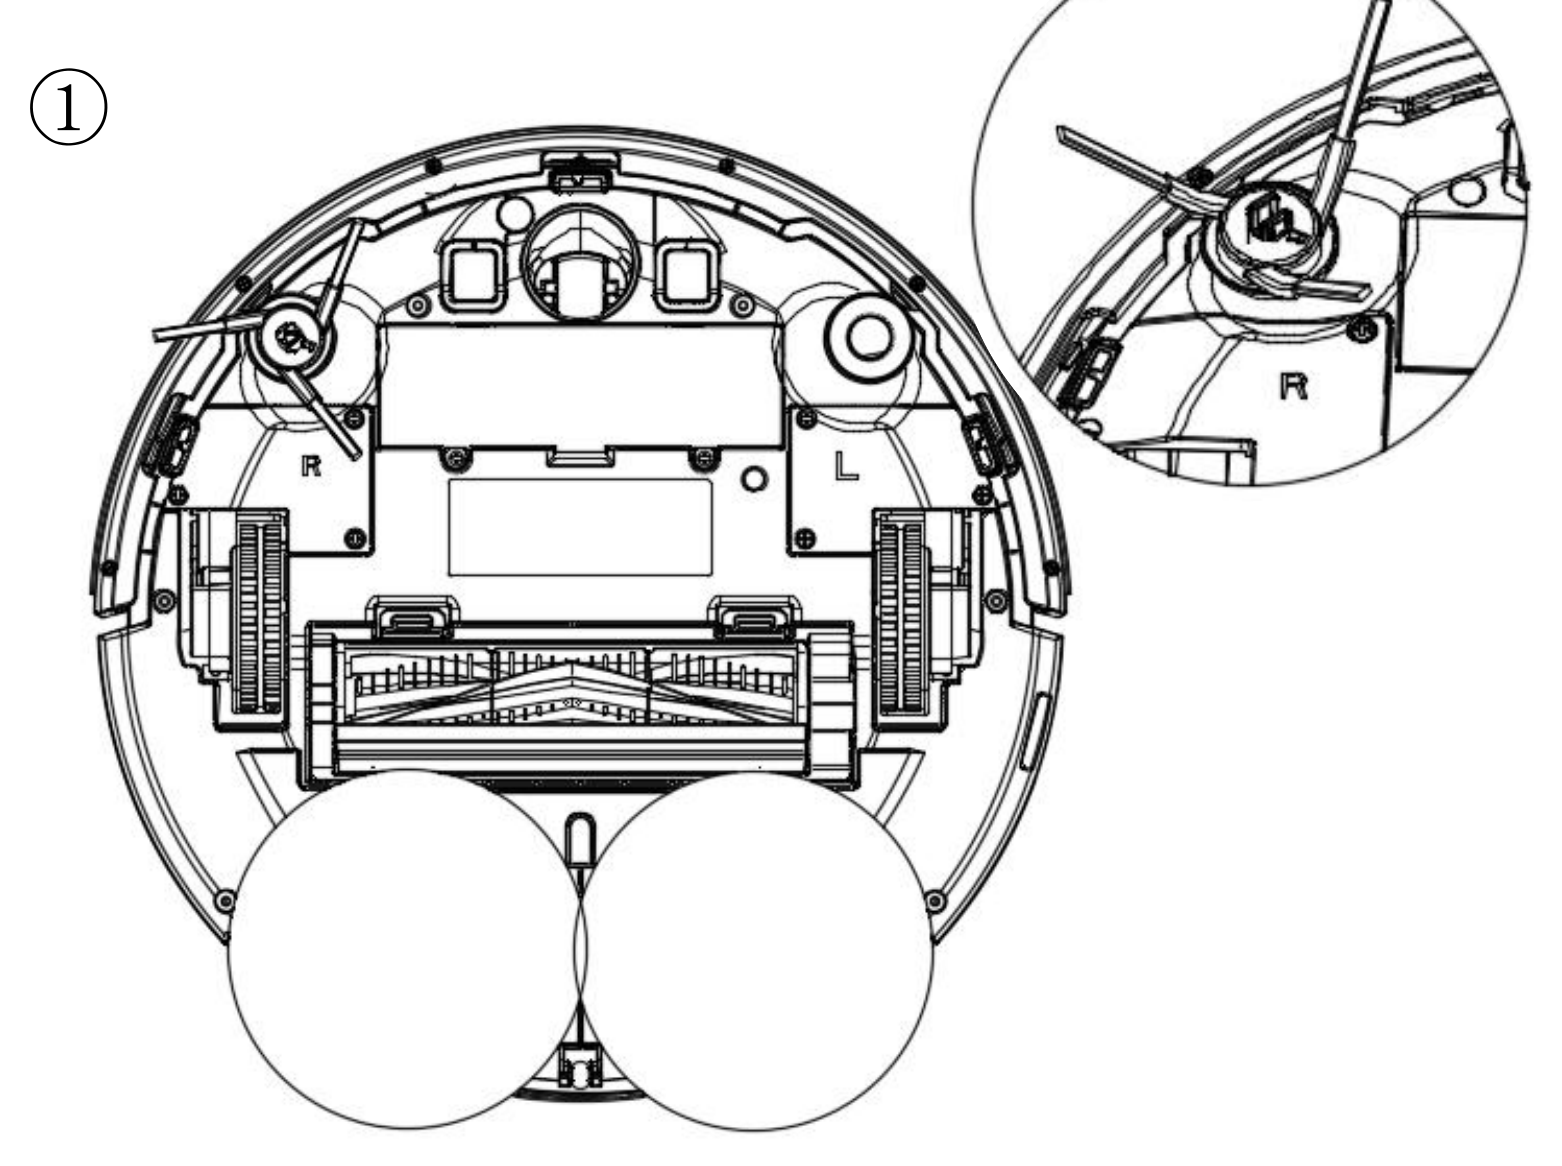
Get to know the product
Identify the main components of your Velds V50 PRO.
Get to know the product
154
Get to know the product
87761061211121313
Get to know the product
293149
Tip
Use this visual guide whenever you need to identify a component or carry out maintenance.
1
Buttons and indicators
Robot controls and status LEDs.
2
Water tank lid
Access to the 2-in-1 tank.
3
Tank release button
Releases the 2-in-1 tank (water and dust).
4
Bumper
Protects the robot from impacts with obstacles.
5
LiDAR sensor
Maps the room with high-precision laser pulses.
6
Anti-drop sensors
Prevent the robot from falling down steps.
7
Side brush
Directs dirt to the main brush.
8
Front wheel
Swivels to make navigation easier.
9
Charging contacts
Connect to the dock for charging.
10
Battery cover
Access to the robot battery.
11
Main brush
Removes dirt from floors and carpets.
12
Main wheels
Provide traction and movement.
13
Spinning mop pads
Scrub the floor, removing heavy dirt.
14
Dust outlet
Transfers dust to the dock during auto-emptying.
Velds V50 PRO | Quick Start Guide
04
Charging dock and dust box
Get to know the self-emptying charging dock.
Charging dock and dust box
213354
Charging dock and dust box
1
Charging dock with dust box
Where the robot recharges and auto-empties.
2
Dust box lid
Access to the compartment and to the dust bag.
3
Charging contacts
Connect to the robot for charging.
4
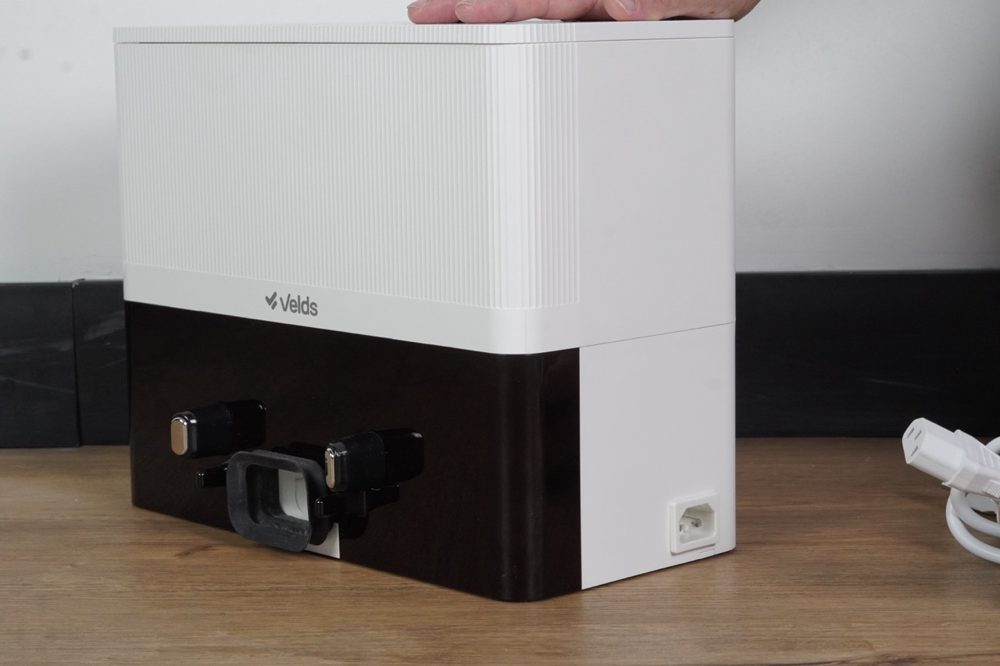
Power cable connector
Where the power cable plugs into the dock.
5
Dust box suction inlet
Where the dock vacuums debris from the robot during auto-emptying.
Dock and dust management
The dock automatically transfers debris from the robot into the dust bag inside the dust box. The bag is disposable, not reusable or washable. Replace it when it is full or when the app notifies you.
Tip
Use only genuine Velds dust bags and keep a spare on hand. Replacement bags are available directly from Velds.
Velds V50 PRO | Quick Start Guide
05
Buttons and indicators
Get to know the functions of the buttons and indicators of the V50 PRO.
Buttons and indicators
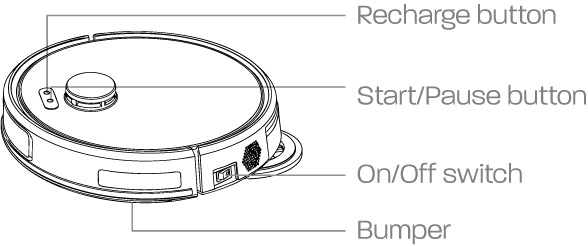
Home button
  • Press once to send the robot to the charging dock.
  • Press any button to pause the return to the dock.
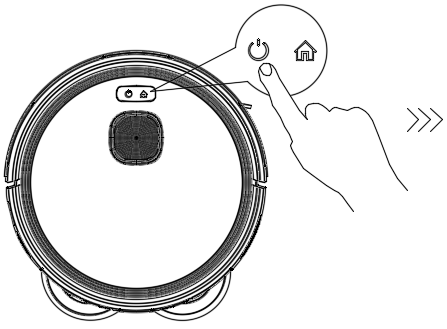
  • Press and hold for 10 seconds to enter pairing mode.
Buttons and indicators
Power/Start button
  • Press once to start cleaning.
  • During cleaning, press any button to pause.
  • Press Power/Start again to resume cleaning.
Buttons and indicators
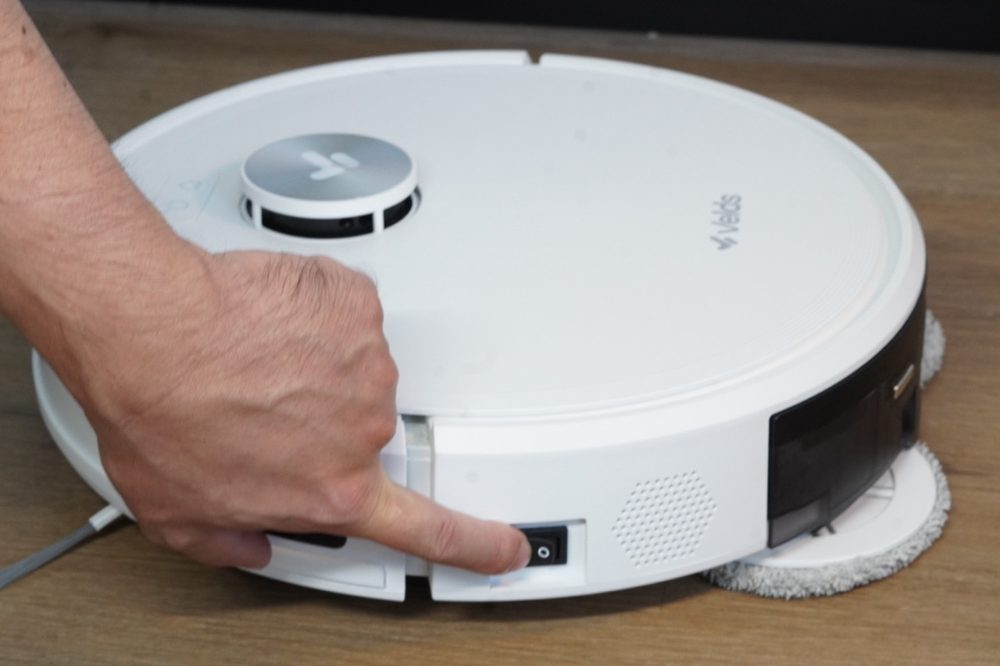
Side switch
  • Turns the robot on and off.
Velds V50 PRO | Quick Start Guide
06
LED indicators and colors
The LED indicators show the status of the robot.
Solid white
Normal operation, robot on and ready to use.
Home button blinking white
Charging.
Home button solid white on the dock
Battery fully charged.
Home button blinking red
A problem has been detected. Returning to the dock.
Power button blinking red
A problem has been detected. The robot announces the error.
Home button blinking white quickly
Pairing mode. Quick Pairing over Bluetooth LE available.
All indicators off
Robot powered off.
Tip
Whenever the robot runs into a problem, the LED blinks red. See section 27 — Troubleshooting for more information.
Voice messages
Along with the LED, the robot announces the error out loud. Listen to the spoken message and follow the instruction it gives.
Velds V50 PRO | Quick Start Guide
07
Prepare the robot for first use
Before turning the V50 PRO on for the first time, follow the steps below.
01
Remove all protective film and the bumper transport locks
Prepare the robot for first use
02
Turn the robot on
1
Gently press the bumper to check that it moves freely.
2
Turn the robot on with the side switch on the side of the body.
Prepare the robot for first use
Important
Check that every protection has been removed before the first use, and that the bumper moves freely.
Velds V50 PRO | Quick Start Guide
08
Install the side brushes
Install the two side brushes on the robot.
1
Fit each side brush in place and press until you hear the click.
2
Check that both brushes are firmly attached and spin freely.
Note
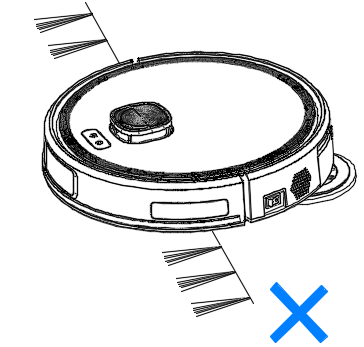
Use only two brushes. The other two are spares. The brushes are not marked left or right, so either one fits either side.
Tip
Keep the spare brushes in a dry place. Replace them when the bristles are permanently bent or worn.
Correct brush installation
Install the side brushes
Mounting position
Install the side brushes
Press until it clicks
Either brush fits either side. Two brushes are for installation, the other two are spares.
Velds V50 PRO | Quick Start Guide
09
Fill the 2-in-1 tank
Before using the mopping function, follow the steps below.
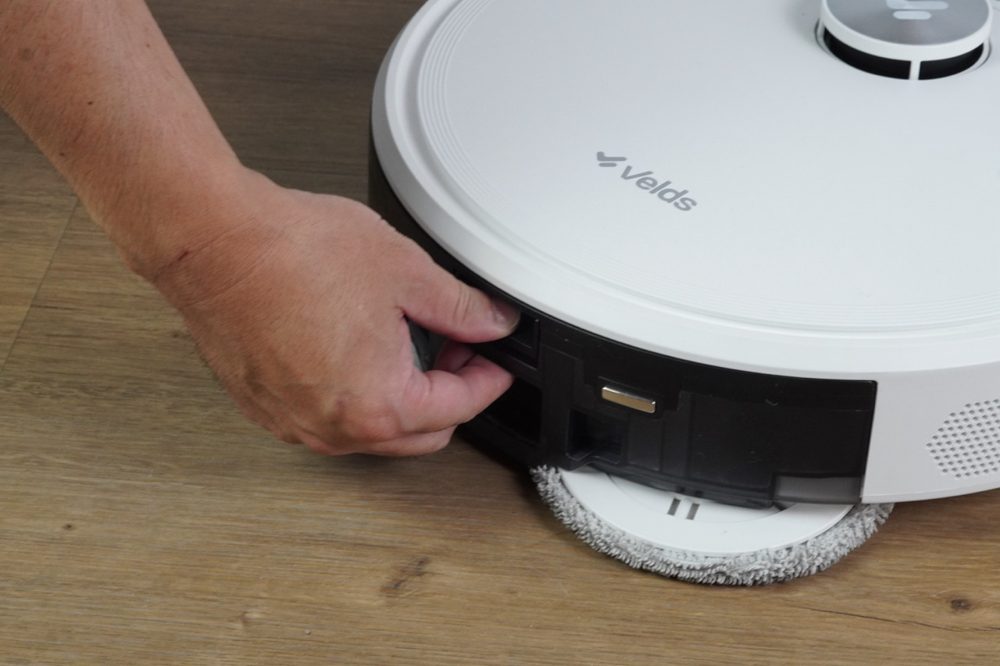
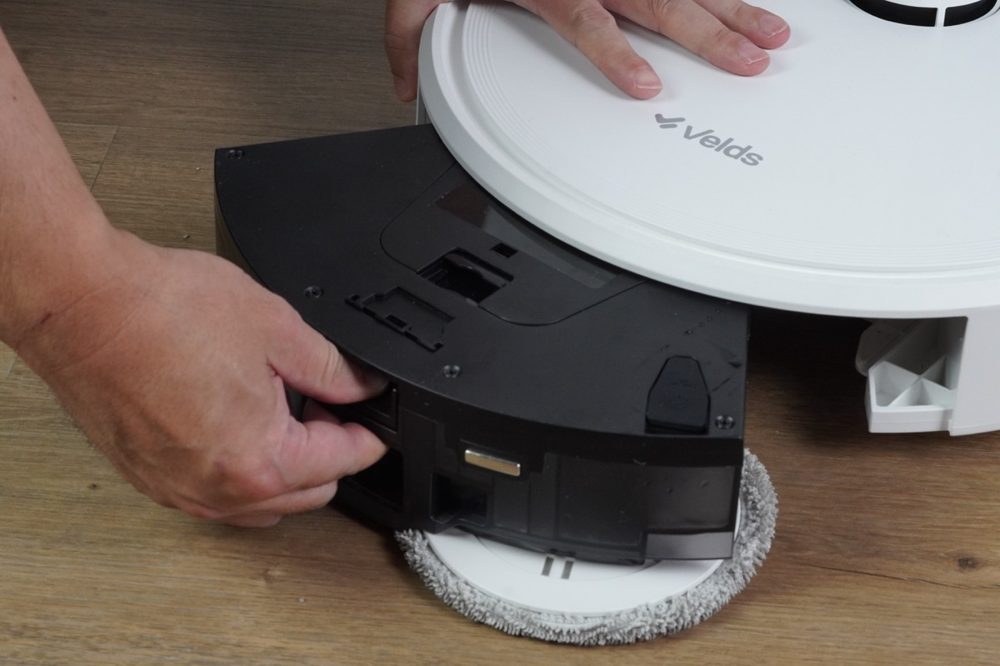
1
Press the release button
And pull the 2-in-1 tank out carefully.
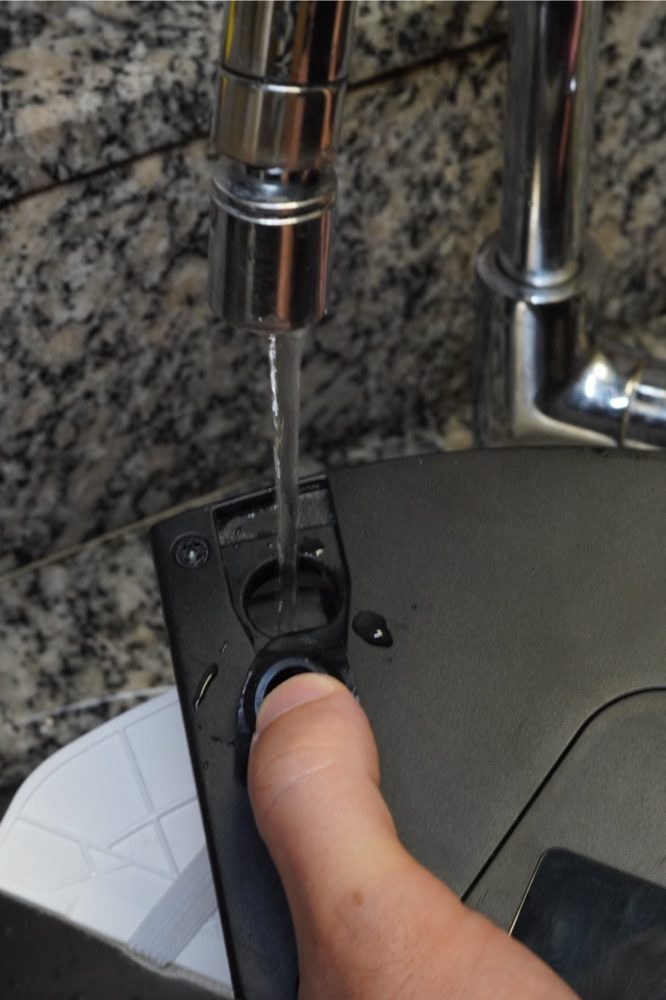
2
Open the fill lid
Lift the silicone lid to reach the water inlet.
3
Add clean water only
Use clean water at room temperature. Do not go over the maximum level.
4
Close the lid completely
Press the silicone lid until it is well sealed, with no part raised.
5
Dry the outside of the tank
Remove any excess water to avoid leaks.
6
Put the tank back
Fit the tank into the robot until you hear it lock into place.
Warning
Add only clean water at room temperature. Do not add disinfectants, hot water, bleach, alcohol, soap, foaming detergents or any other chemical or corrosive product. They can damage the pump and the water lines and will void the warranty on those parts.
1
Fill the 2-in-1 tank
2
Fill the 2-in-1 tank
3
Fill the 2-in-1 tank
4
Fill the 2-in-1 tank
5
Fill the 2-in-1 tank
6
Fill the 2-in-1 tank
Important tip
Empty the water tank after each use to prevent leaks and odors. To extend the service life of the tank, use clean, filtered water.
Velds V50 PRO | Quick Start Guide
10
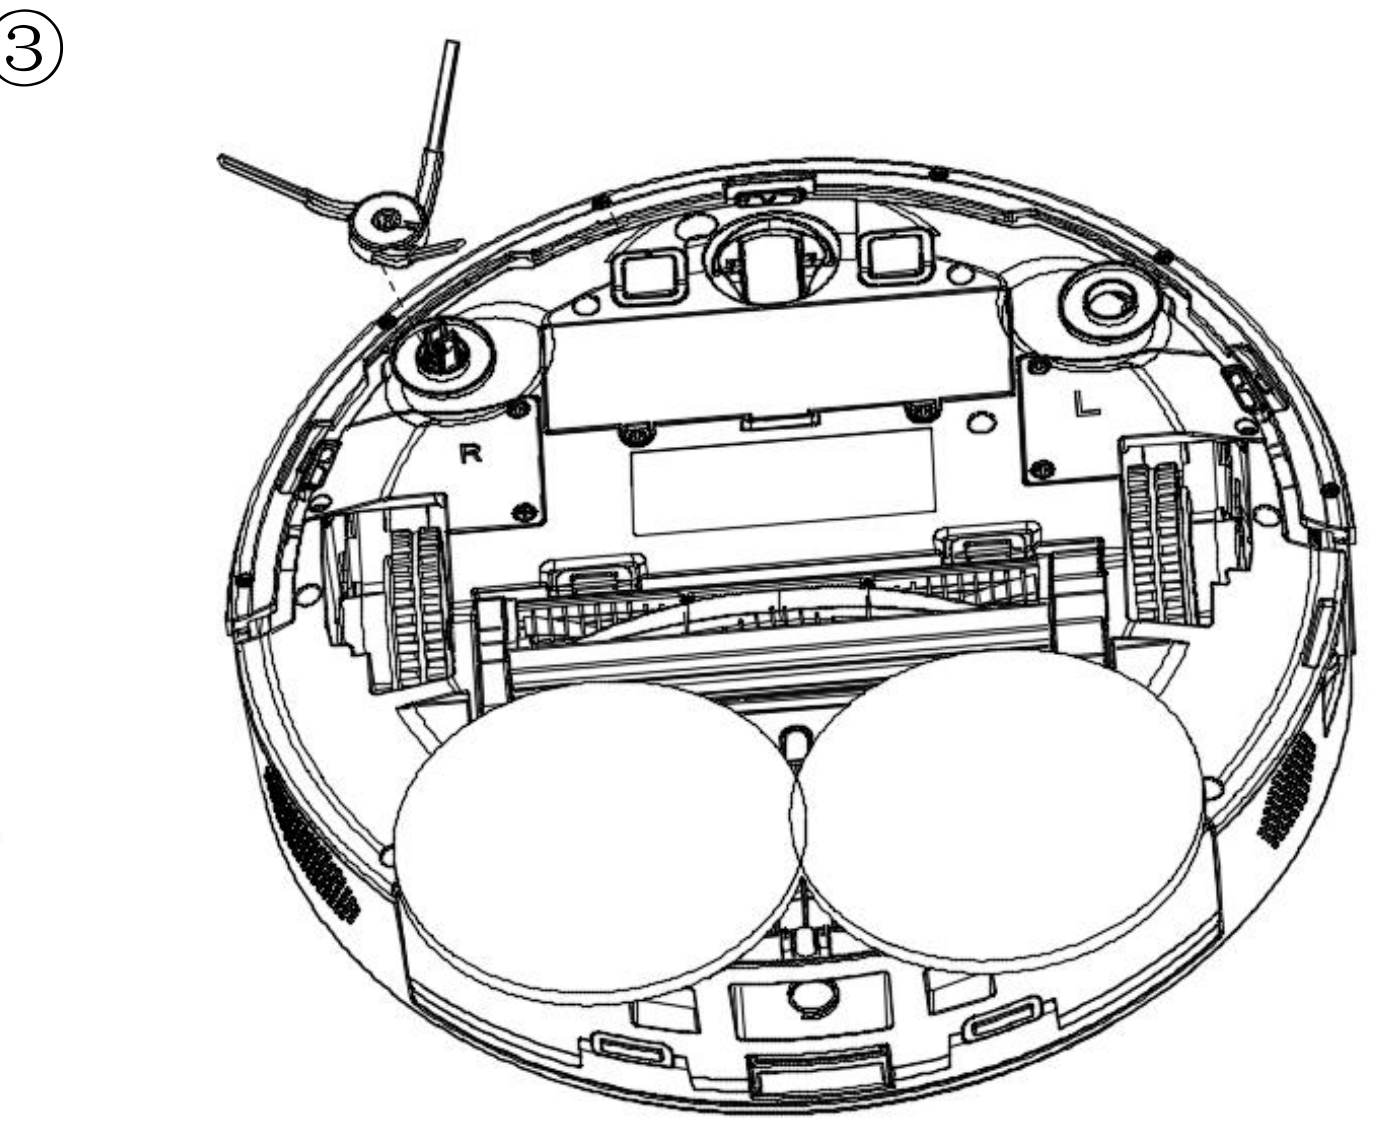
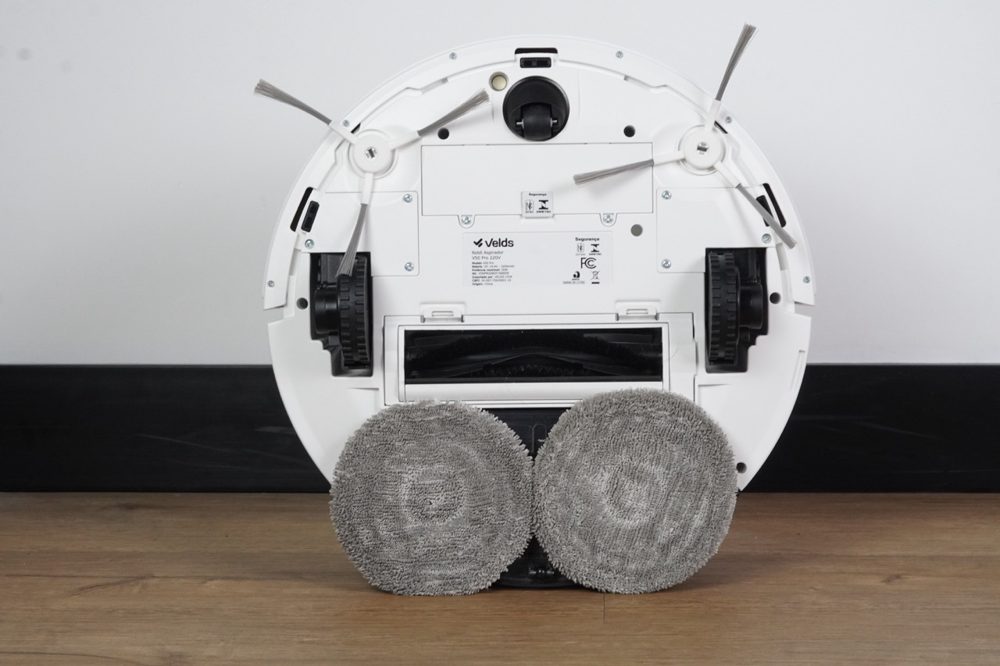
Prepare and install the mop pads
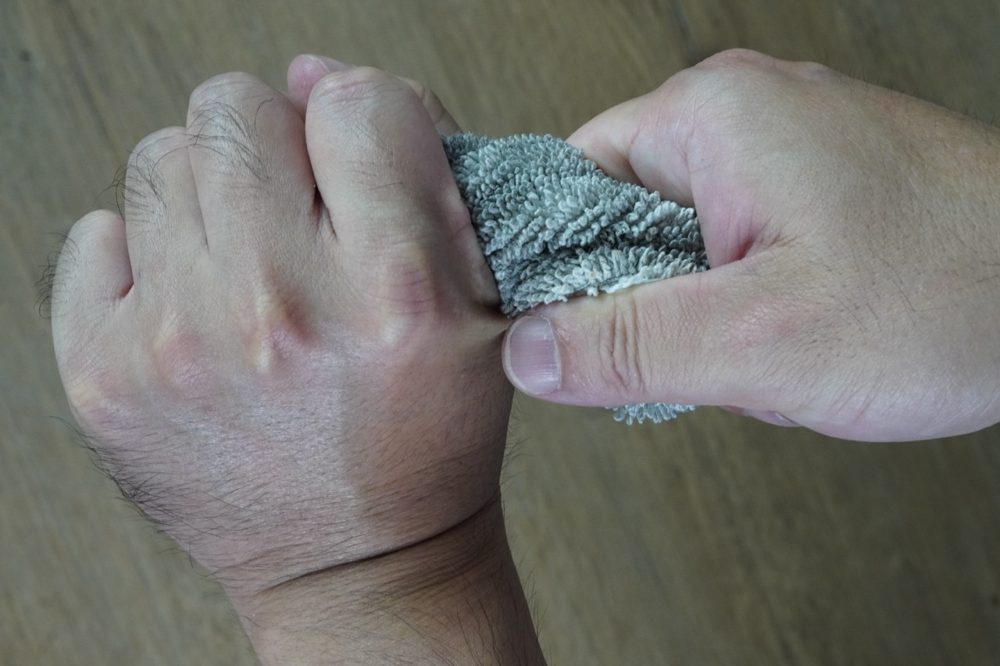
The mop pads must be damp for efficient cleaning, never soaked.
01
Remove the 2-in-1 tank to reach the spinning mop pads underneath.
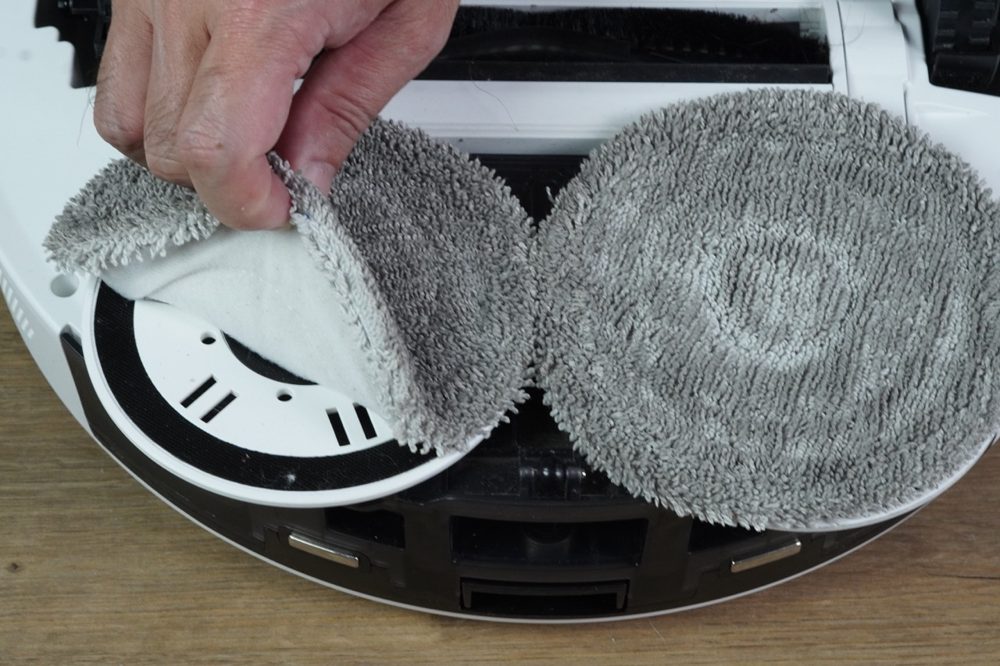
02
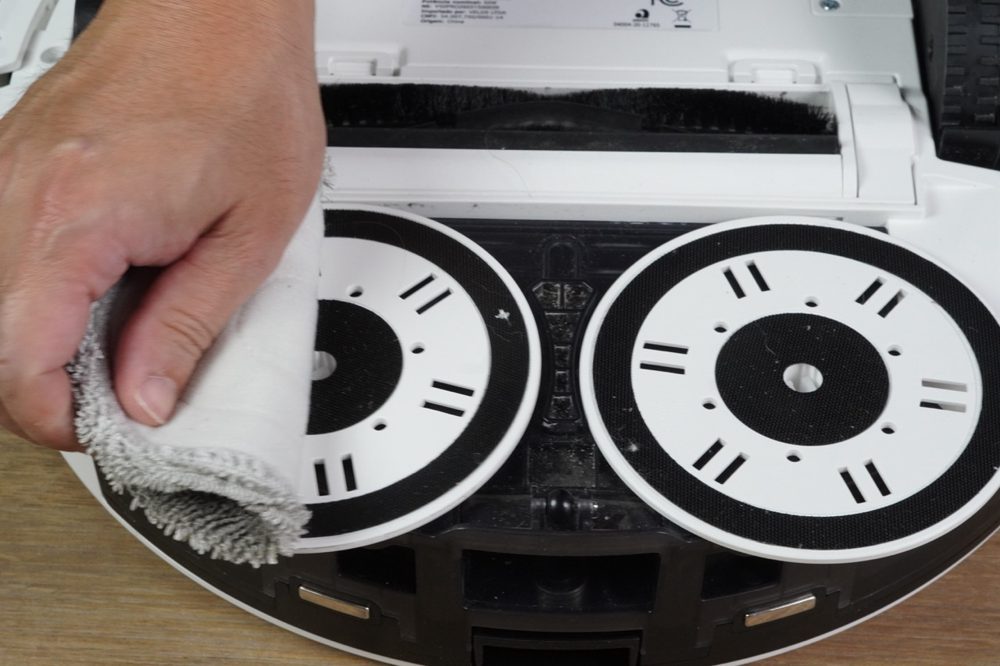
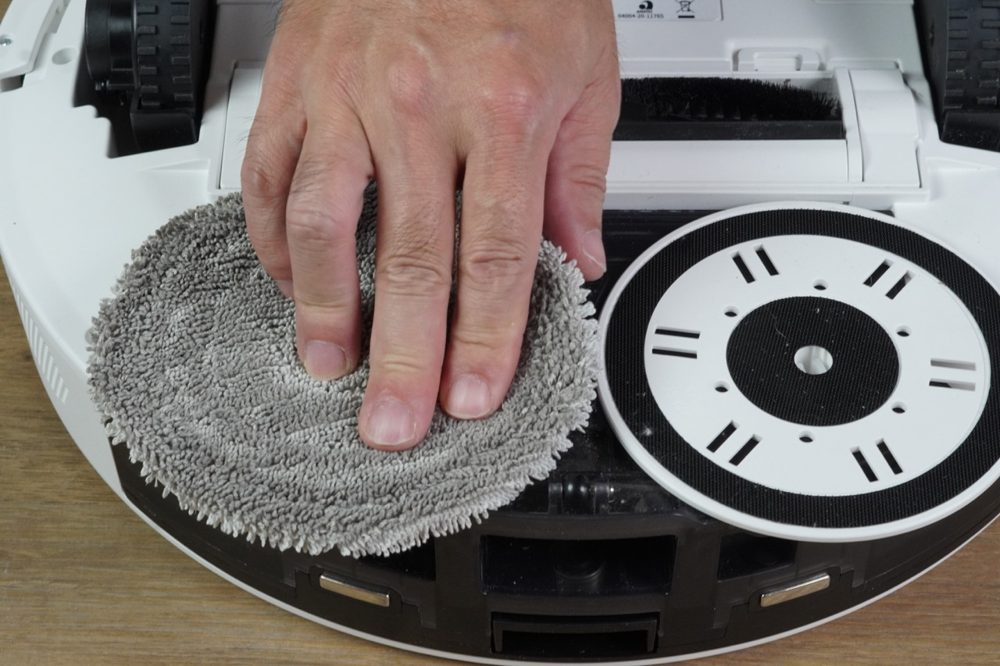
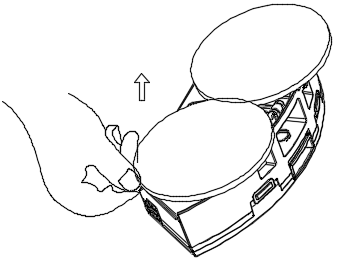
Peel the mop pad off the hook-and-loop fastener.
03
Wash each pad and wring it gently to remove the excess water.
04
Put the pad back on, centered and aligned with its holder.
05
Press it onto the fastener so that it sits evenly.
06
Fit the tank back in until it locks. Ready to vacuum and mop.
Important tip
After each use, remove the spinning mop pads, wash them and let them dry. This prevents odors and extends the life of the pads.
Important
The pad must be damp, never soaked. Use the mopping system only with the pads correctly installed.
Velds V50 PRO | Quick Start Guide
11
The mop holders
The V50 PRO mops with two rotating mop holders.
How the holders work
1
To install
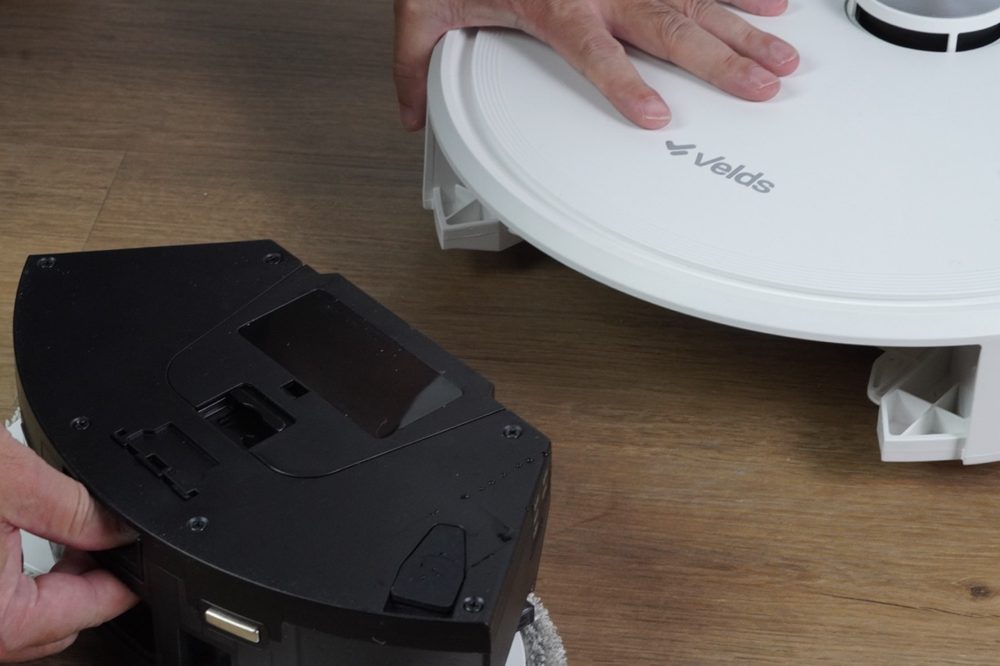
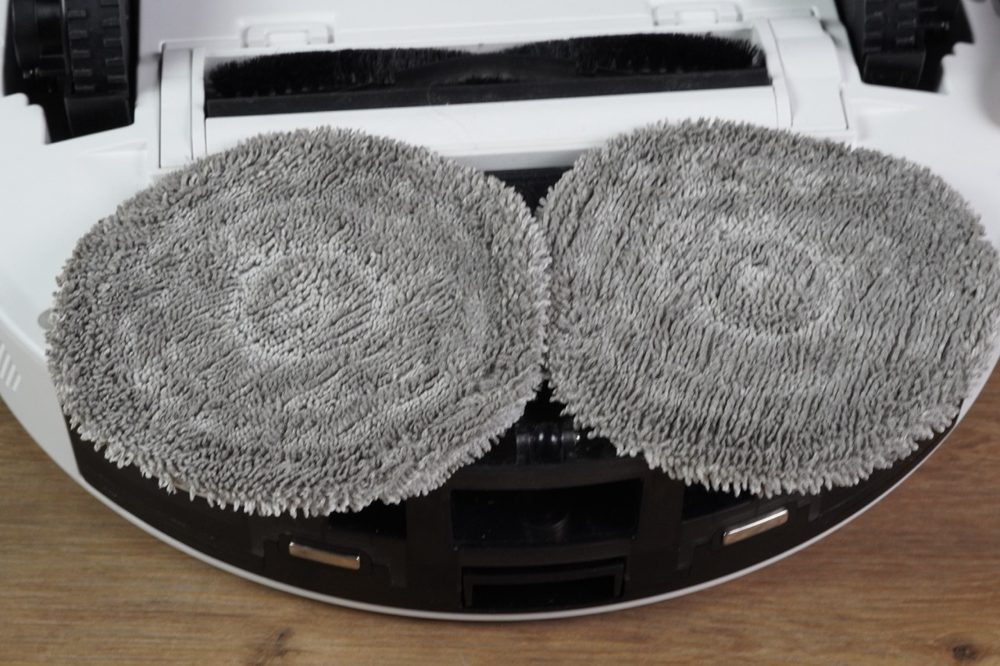
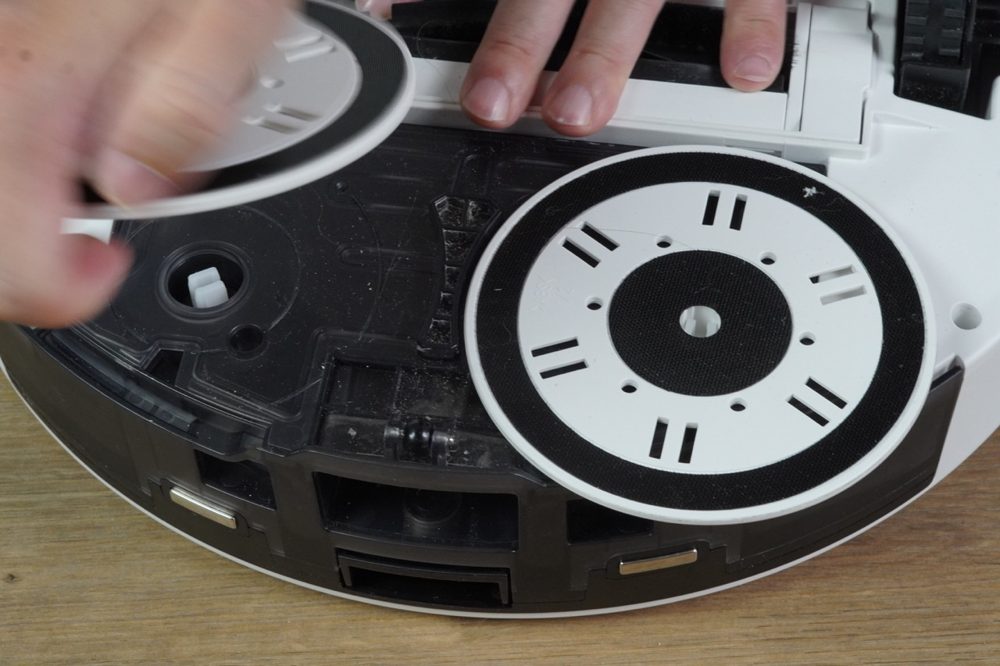
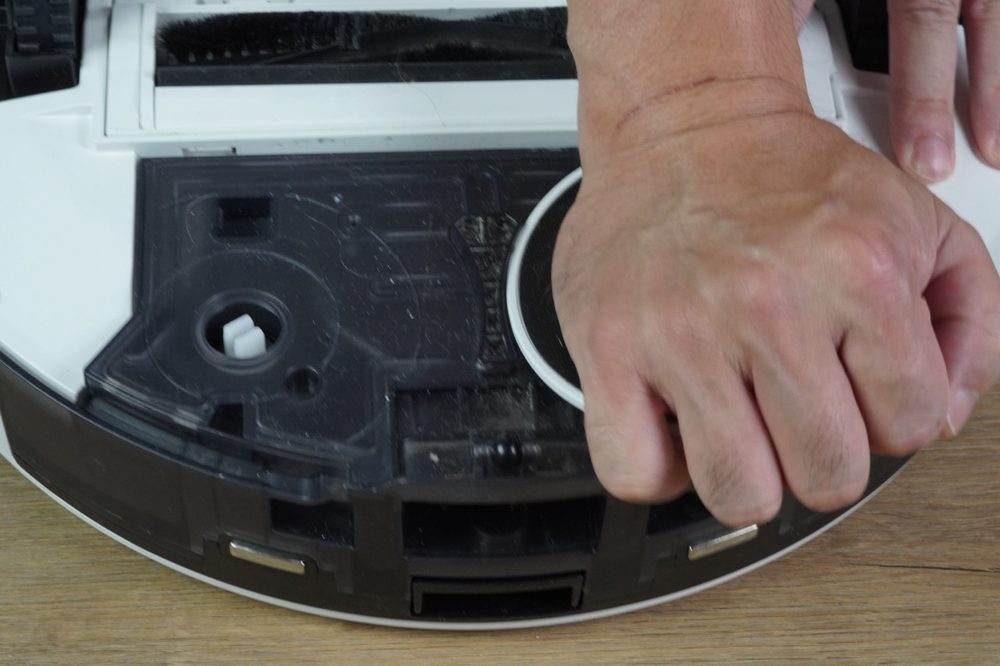
The mop holders click into the bottom of the robot. Press until you hear the click.
2
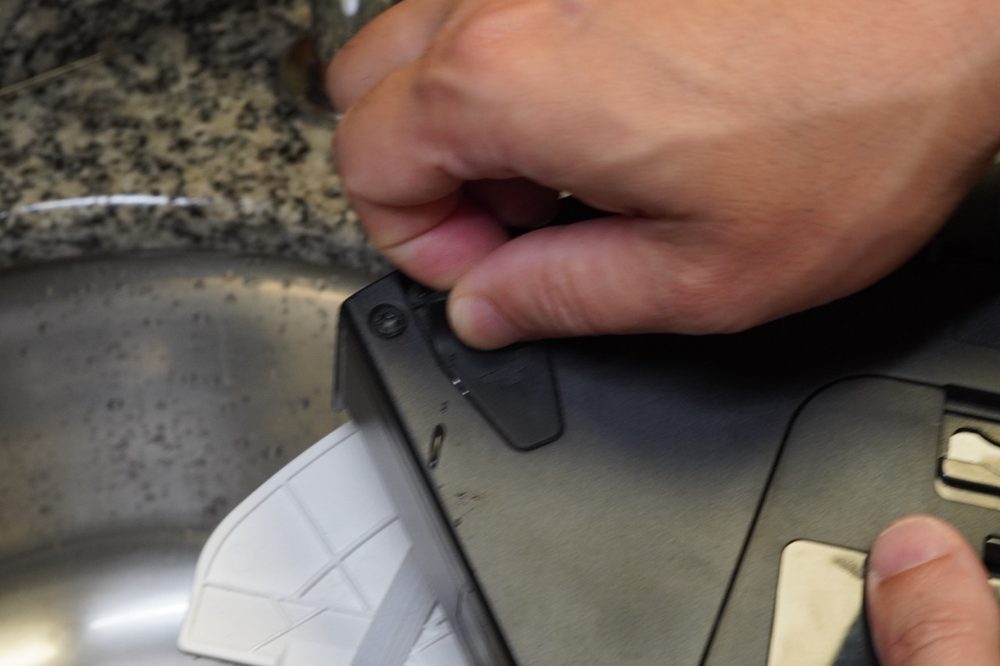
To remove
Peel the pad off the hook-and-loop fastener, then release the holder.
3
For vacuum-only mode
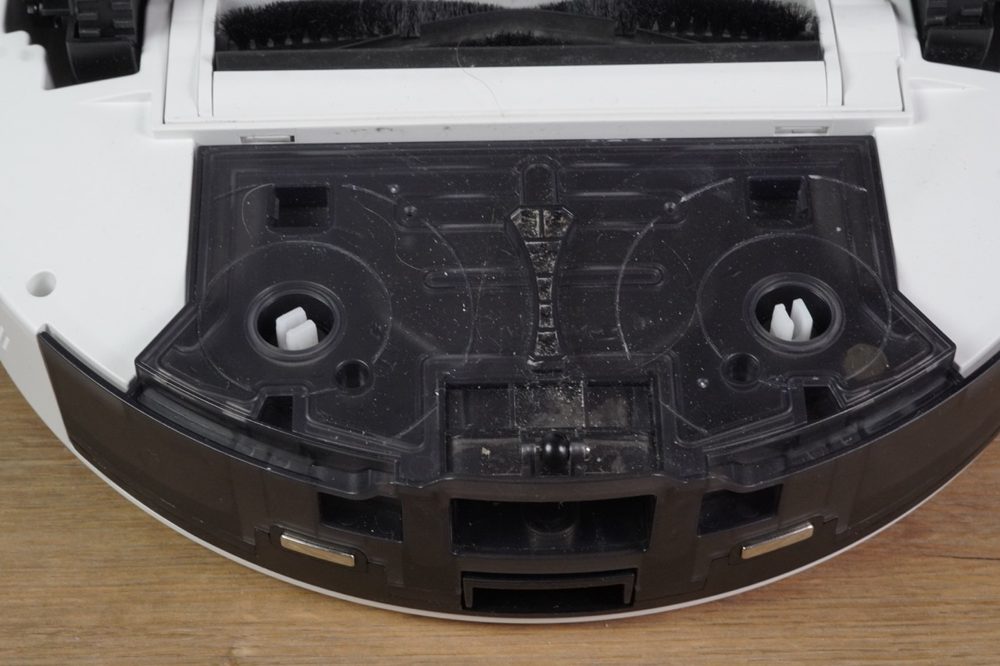
Remove the pads and the holders. This is the recommended setup for rugs and carpets.
Important
Never run the robot with the holders installed but without the mop pads. The exposed hook-and-loop fastener grabs the fibers of rugs and carpets, which can jam and damage the robot. If you remove the pads, remove the holders as well, or keep the robot away from rugs.
1
The mop holders
Both holders in place
2
The mop holders
Grip the holder to release it
3
The mop holders
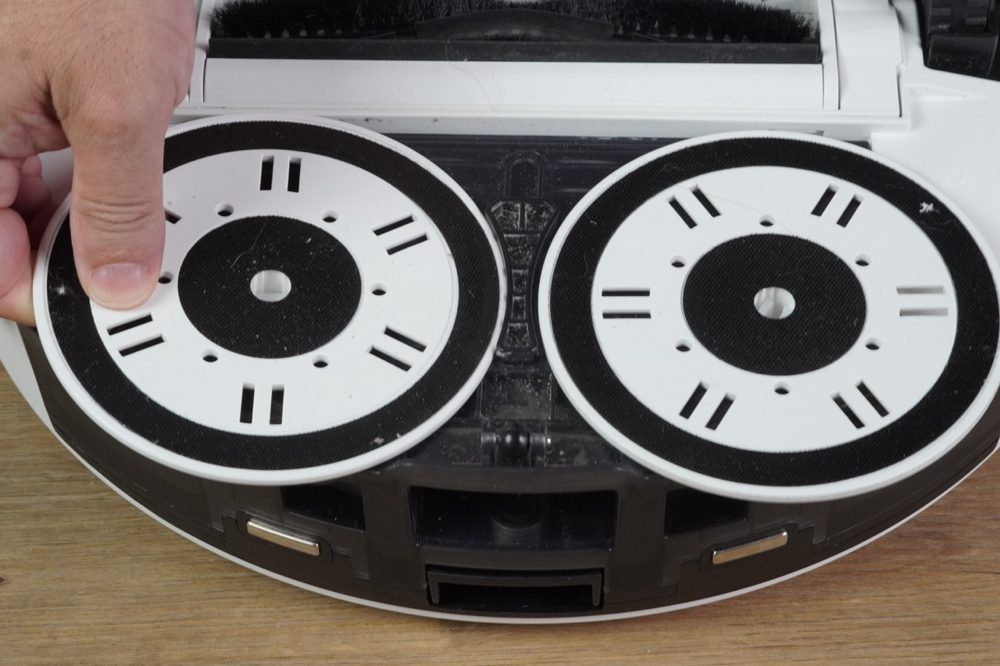
Lift the holder off
4
The mop holders
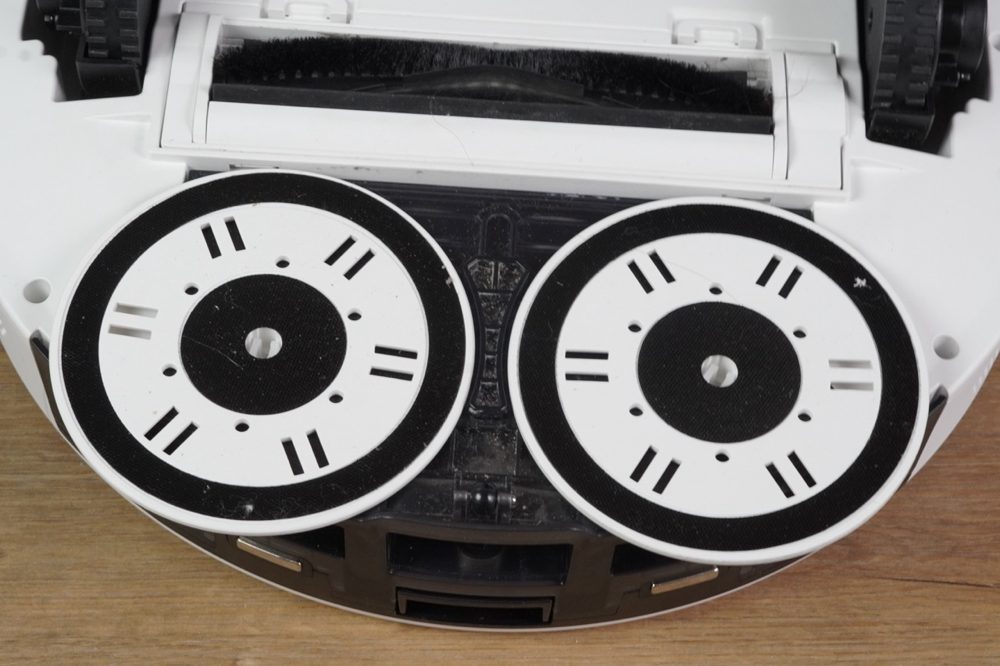
Remove the second holder
5
The mop holders
Robot with both holders off
Velds V50 PRO | Quick Start Guide
12
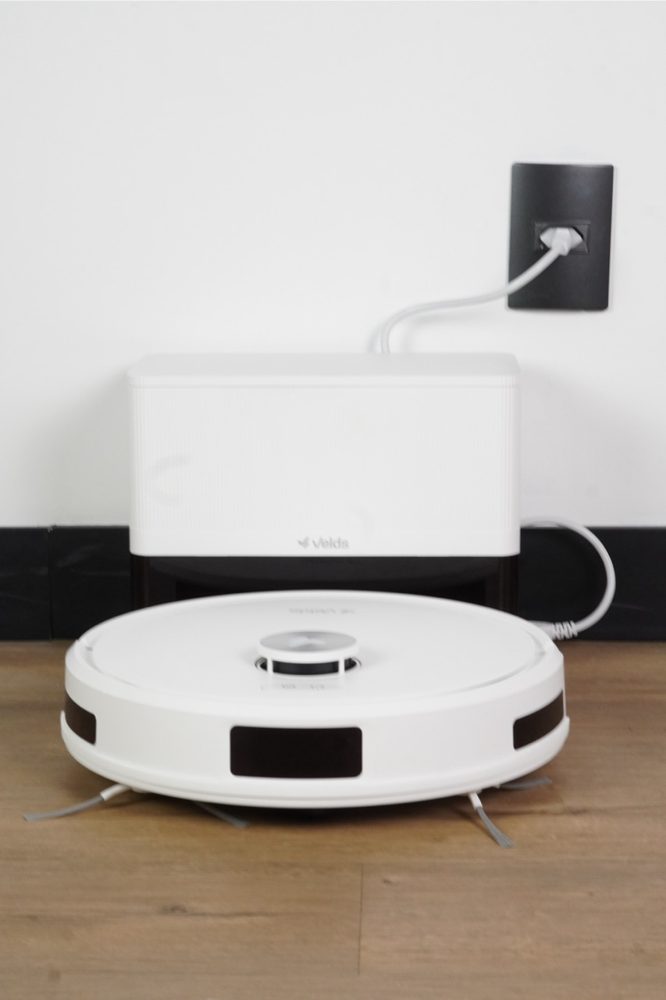
Position and connect the charging dock
Choose the right spot before the first charge.
Important
Before the first use, charge the battery completely, up to 100%.
If charging does not start,
reposition the robot on the dock.
Confirm that the charging contacts
of the robot and the dock are aligned.
The robot stays powered on
while it is on the dock.
W A L L CHARGING DOCK 1 m 1 m 1.5 m Keep this area free of height differences, stairs and objects
1
Choose a flat wall, near a power outlet and with a good Wi-Fi signal.
2
Place the dock on firm, dry and level floor.
3
Keep the area around the dock clear: 1 m to the left and right, 1.5 m in front.
4
Keep highly reflective objects, such as mirrors or glass, away from the dock.
5
Connect the power supply to the dock, then to the outlet.
6
Route the cable so the robot does not pull it while cleaning.
7
Do not move the dock after the robot has started using it — the saved map is referenced to its position.
Avoid placing the dock
On rugs
Near stairs
In direct sunlight
In wet areas
Behind doors
Where the Wi-Fi signal is weak
Velds V50 PRO | Quick Start Guide
13
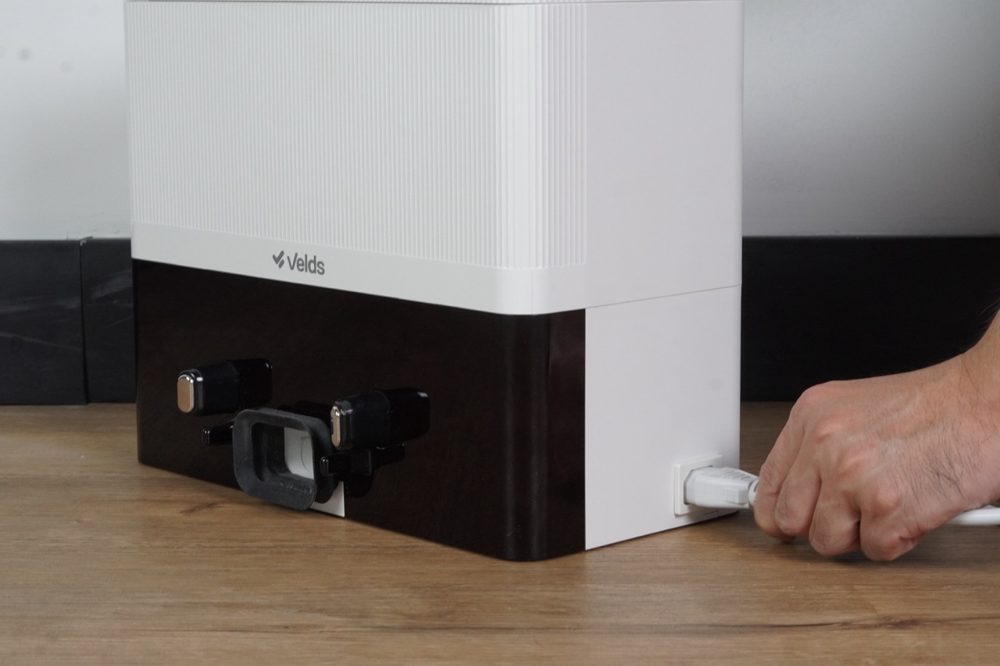
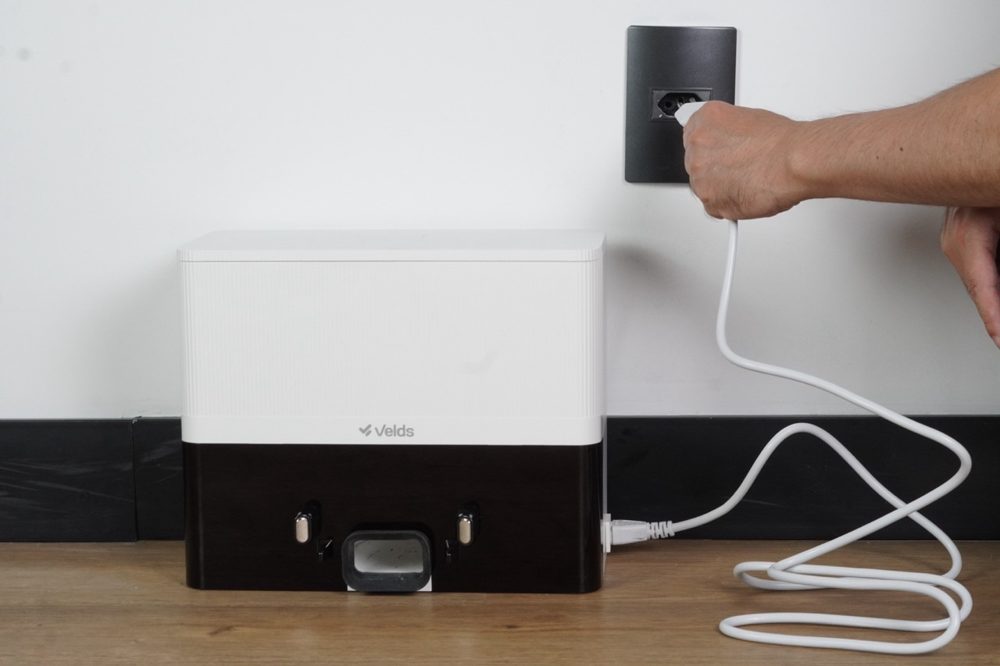
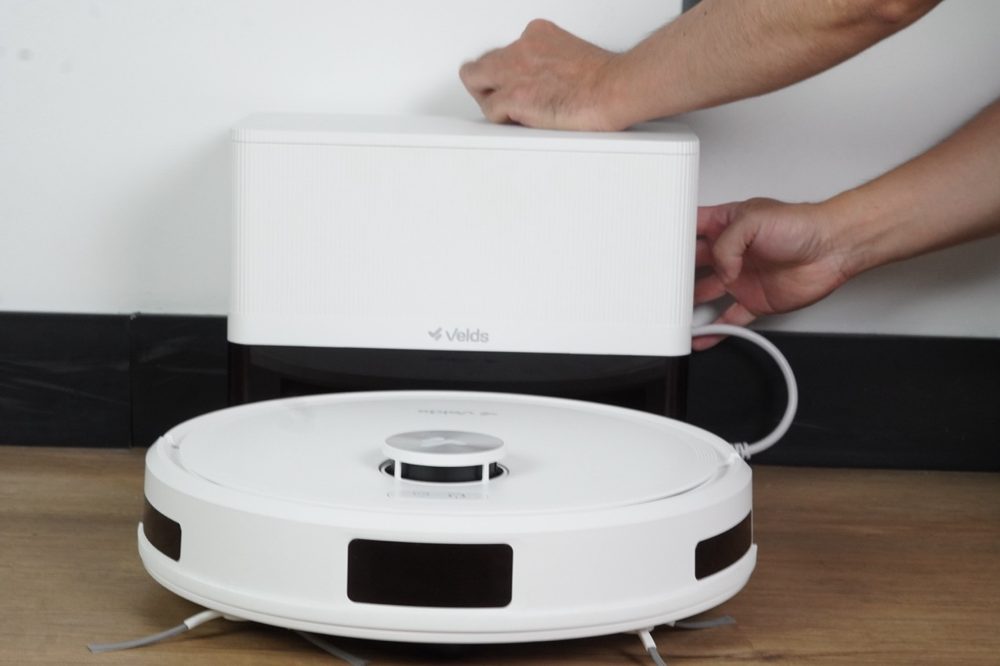
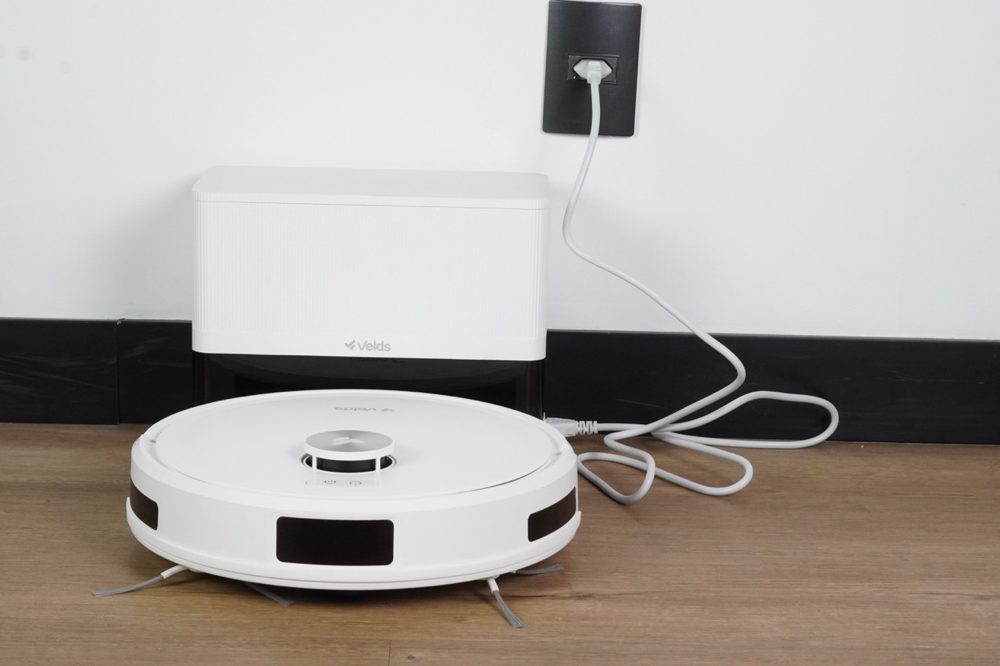
Connect the dock and charge
Connect the power supply and dock the robot for the first charge.
1
Connect the dock and charge
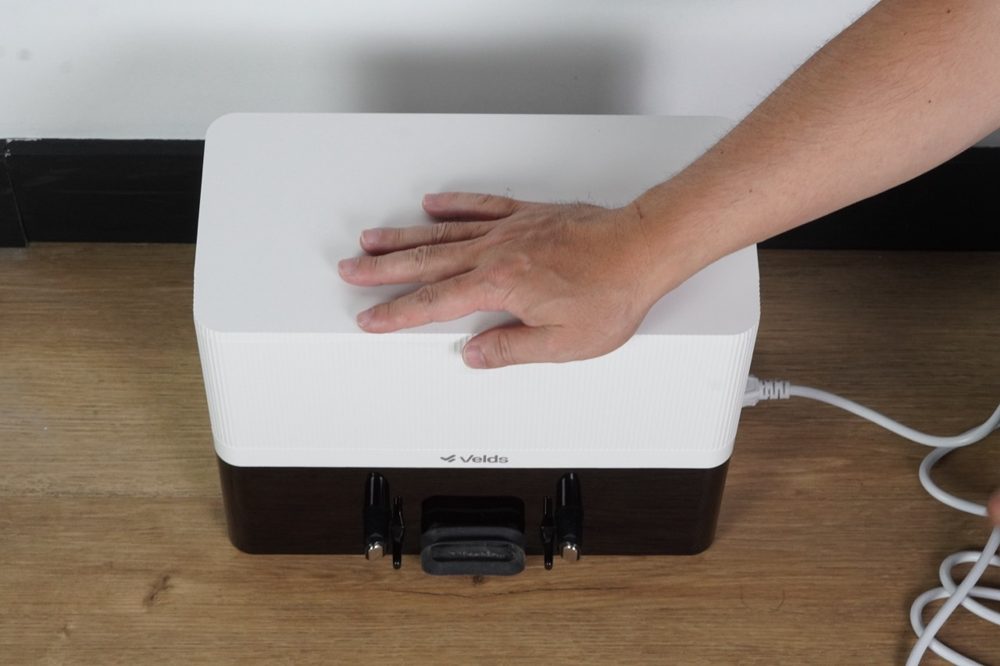
Find the connector on the dock
2
Connect the dock and charge
Plug the cord into the dock
3
Connect the dock and charge
Plug it into the wall outlet
4
Connect the dock and charge
Route the cable behind the dock
5
Connect the dock and charge
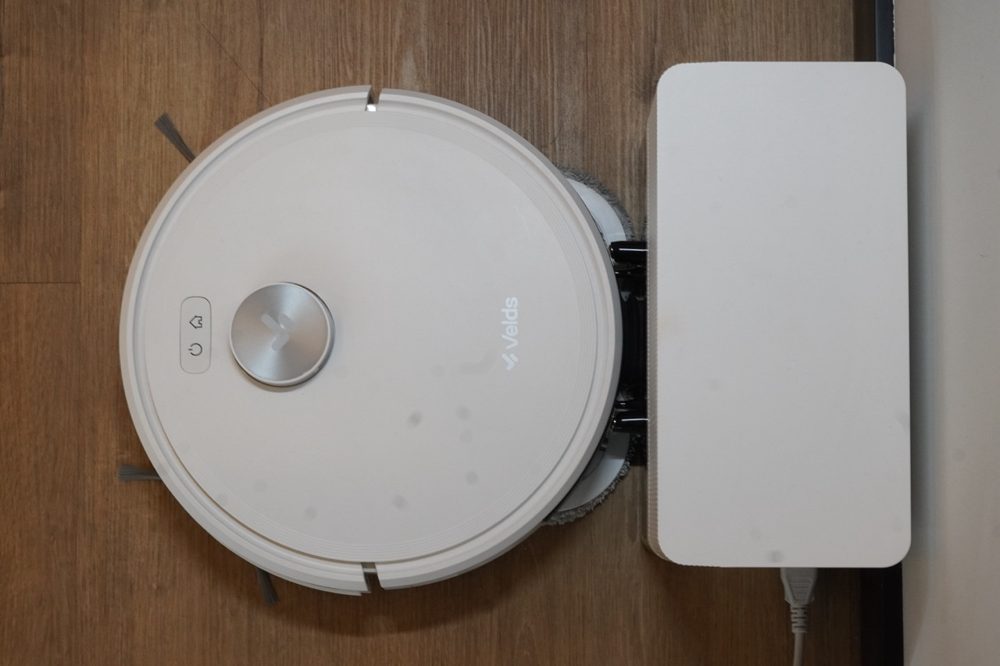
Place the robot at the dock
Connect the dock and charge
Robot docked and charging
Reminders for everyday use
Keep the robot docked, the dock plugged in and the robot switched on. That way your V50 PRO is always ready to clean.
Clean the charging contacts of the dock regularly to avoid charging problems.
Do not place the dock where it gets a lot of sun exposure — prolonged exposure to sunlight can damage the robot.
If you will not use the robot for a long period, charge it fully, switch it off, store it in a dry and well-ventilated place and recharge it every 3 months.
If the battery has been discharged too deeply or unused for a long time, the product may not recharge properly. Contact support for service — do not disassemble it yourself.
Battery care
Keep the robot on the dock, charging, whenever it is not in use. For long storage, leave it with about 50% charge in a dry, well-ventilated place.
Tip
The robot normally returns to the dock before the battery runs out. If it gets stuck away from the dock, free it and put it back on the dock as soon as possible.
Velds V50 PRO | Quick Start Guide
14
Prepare the area for cleaning
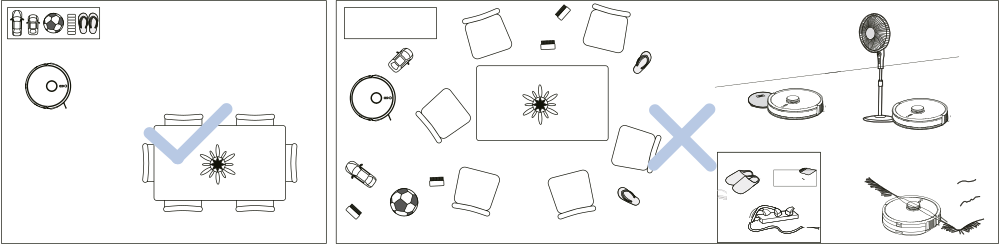
Before starting, tidy the area to get the best performance from your V50 PRO.
Before you start
1
Tidy the area and remove small objects, toys and fragile items from the floor.
2
Put away scales, fan bases and other low objects that could trap the robot.
3
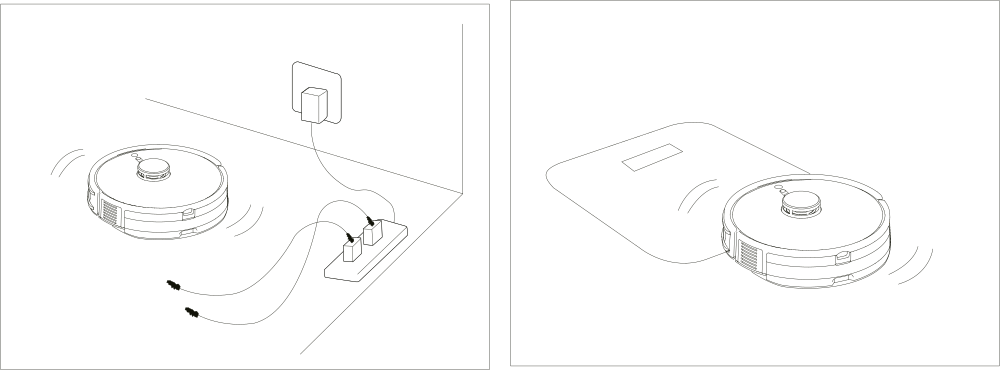
Remove loose cables, cords and extension leads to avoid tangles and interruptions.
4
Open the room doors so the robot can map and clean every area.
5
If a rug has tassels, tuck the edge under the rug, or take the rug out of the area.
6
Anti-drop sensors help prevent falls, but block off areas with stairs for extra safety.
Most common tangle hazards
Shoelaces
Pet toys
Phone chargers
Thin curtains
Prepare the area for cleaning
Tuck rug tassels under the rug
Prepare the area for cleaning
Use a barrier at steps
Prepare the area for cleaning
Remove cords and ropes
Warning
Do not leave liquids on the floor. The V50 PRO is not waterproof and can be damaged when it drives through a wet area.
Note
The anti-drop sensors are located only on the front of the robot. It may move backwards in some situations and, near steps, it may fall.
Floors and obstacles
Suitable for wood, ceramic or porcelain tile and laminate. Climbs thresholds up to 2 cm; larger height differences may stop it.
Rugs and carpets
The robot does not lift the mop pads. Remove the pads and holders before cleaning rugs, or set a no-go zone in the app.
Virtual walls
To keep the robot away from the edge of steps, use the virtual wall function in the Velds app.
Velds V50 PRO | Quick Start Guide
15
Operate the robot with the buttons
Make sure the robot is switched on and has enough battery. The Power/Start LED should be solid white.
1
On / Off
Flip the side switch to turn the robot on or off.
2
Start
Press the Power/Start button. The robot starts cleaning in Auto mode.
3
Pause
During cleaning, press any button to pause. The LED blinks white.
4
Resume
Press Power/Start again. The robot continues from where it stopped.
5
Recharge
Press the Home button to send the robot back to the dock.
6
Cancel the return
Press any button. The robot stays where it is.
Operate the robot with the buttons
Side switch: turns the robot on and off
Operate the robot with the buttons
Power/Start button on top of the robot
Efficient mapping
The V50 PRO uses its LiDAR sensor to map the room and clean following an efficient algorithm, covering the home in an organized way and without going over the same areas twice.
Before mapping
Open the room doors and clear objects off the floor so that the map comes out more complete. For more advanced commands, use the Velds app — see section 18.
Velds V50 PRO | Quick Start Guide
16
Cleaning modes and floor compatibility
The cleaning mode is selected from the mode selector on the control screen of the Velds app.
Vacuum only
Suction only. Remove the mop pads and holders for better results on rugs.
Mop only
The spinning mop pads only. The robot runs quietly.
Vacuum and mop
Both functions at the same time, in a single pass.
Vacuum then mop
Vacuums the area first and then mops it in a second pass.
Safe to use the mop pads on
The spinning mop pads are designed for smooth, sealed surfaces, where the pads glide evenly and keep constant contact with the floor.
  • Porcelain tile, ceramic and glazed tile
  • Sealed vinyl and laminate floors
  • Sealed or varnished wood, at a low moisture level
  • Polished marble and granite
Avoid using the mop pads on
Because they rotate, the pads scrub with more friction. On rough, porous or unsealed surfaces this reduces efficiency, wears the pad faster and can mark delicate finishes.
  • Wood that is not varnished, sealed or oiled
  • Unsealed natural stone, where water can seep in and stain
  • Rough, anti-slip or heavily textured floors
  • Carpets and rugs — the robot does not lift the pads while mopping

Tip
On wood or laminate floors, use the lowest moisture level and never leave the robot standing on the surface with damp mop pads.
Note
Remove the mop pads before cleaning areas with rugs, or set a no-go zone in the app.
Velds V50 PRO | Quick Start Guide
17
Install the smartphone app
Download the Velds app and create your account before pairing.
1
Download the Velds app
Available on the App Store and on Google Play.
2
Create your account or sign in
Open the app and register an account, or sign in with an existing one.
3
Check your Wi-Fi network
The robot connects only to 2.4GHz networks. 5GHz networks are not supported.
4
Keep the robot near the router
A good signal at the dock makes pairing and daily use more reliable.
5
Allow the Location permission
Android asks for it during pairing. Without it the app cannot find the robot.
Download on the
App Store
GET IT ON
Google Play
QR code to download the Velds app
Download via QR code
Animation of the pairing flow in the Velds app
Pairing process in the Velds app
Note
The Velds app is the same app for every Velds smart home product. If you already use it, just add the V50 PRO to your home — see section 18.
Tip
Turn Bluetooth on your phone before pairing. The V50 PRO supports Quick Pairing over Bluetooth LE, which speeds the process up.
Velds V50 PRO | Quick Start Guide
18
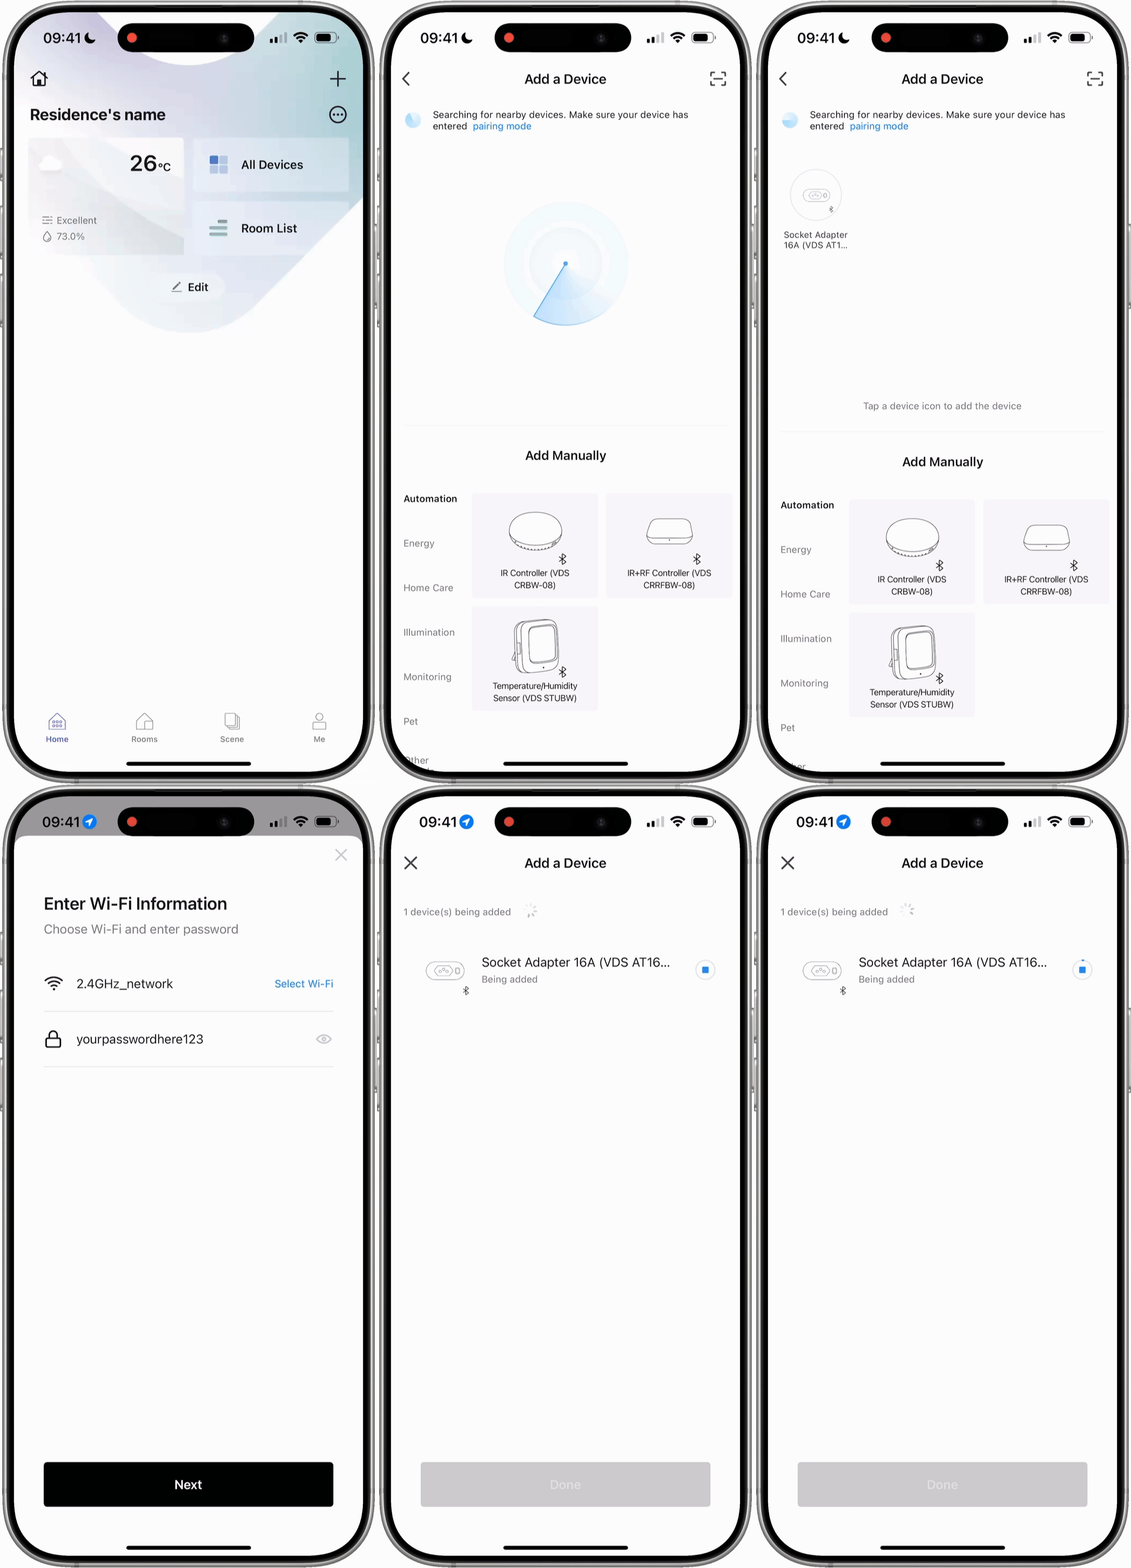
Add the device to the app
Connect your V50 PRO to the app and get full control.
1
Check the network
Make sure your router has the 2.4GHz Wi-Fi network enabled and an active internet connection.
2
Enter pairing mode
With the device on, press and hold the Home button for 10 seconds. The LED blinks white rapidly.
3
Open the Velds app
Tap the "+" symbol and select "Add device".
4
Pick the device
When it appears at the top of the list, tap it and skip to step 6.
5
Or add it manually
Select the "Robot Vacuums" category and then "V50 Series Robot".
6
Enter the Wi-Fi password
Select your 2.4GHz network, enter the password and tap "Next".
7
Wait for the connection
The device connects to the internet and is added to your virtual home.
8
Name the device
Tap the pencil icon to edit the name, assign it to a room and tap "Done".
Animation of the pairing flow in the Velds app
Pairing process in the Velds app
Connection issues?
  • Check that the Wi-Fi LED is blinking.
  • Confirm that the network is 2.4GHz — 5GHz is not supported.
  • Move the phone closer to the robot and the dock.
  • Restart the robot and try again.
  • See section 27 — Troubleshooting.
Velds V50 PRO | Quick Start Guide
19
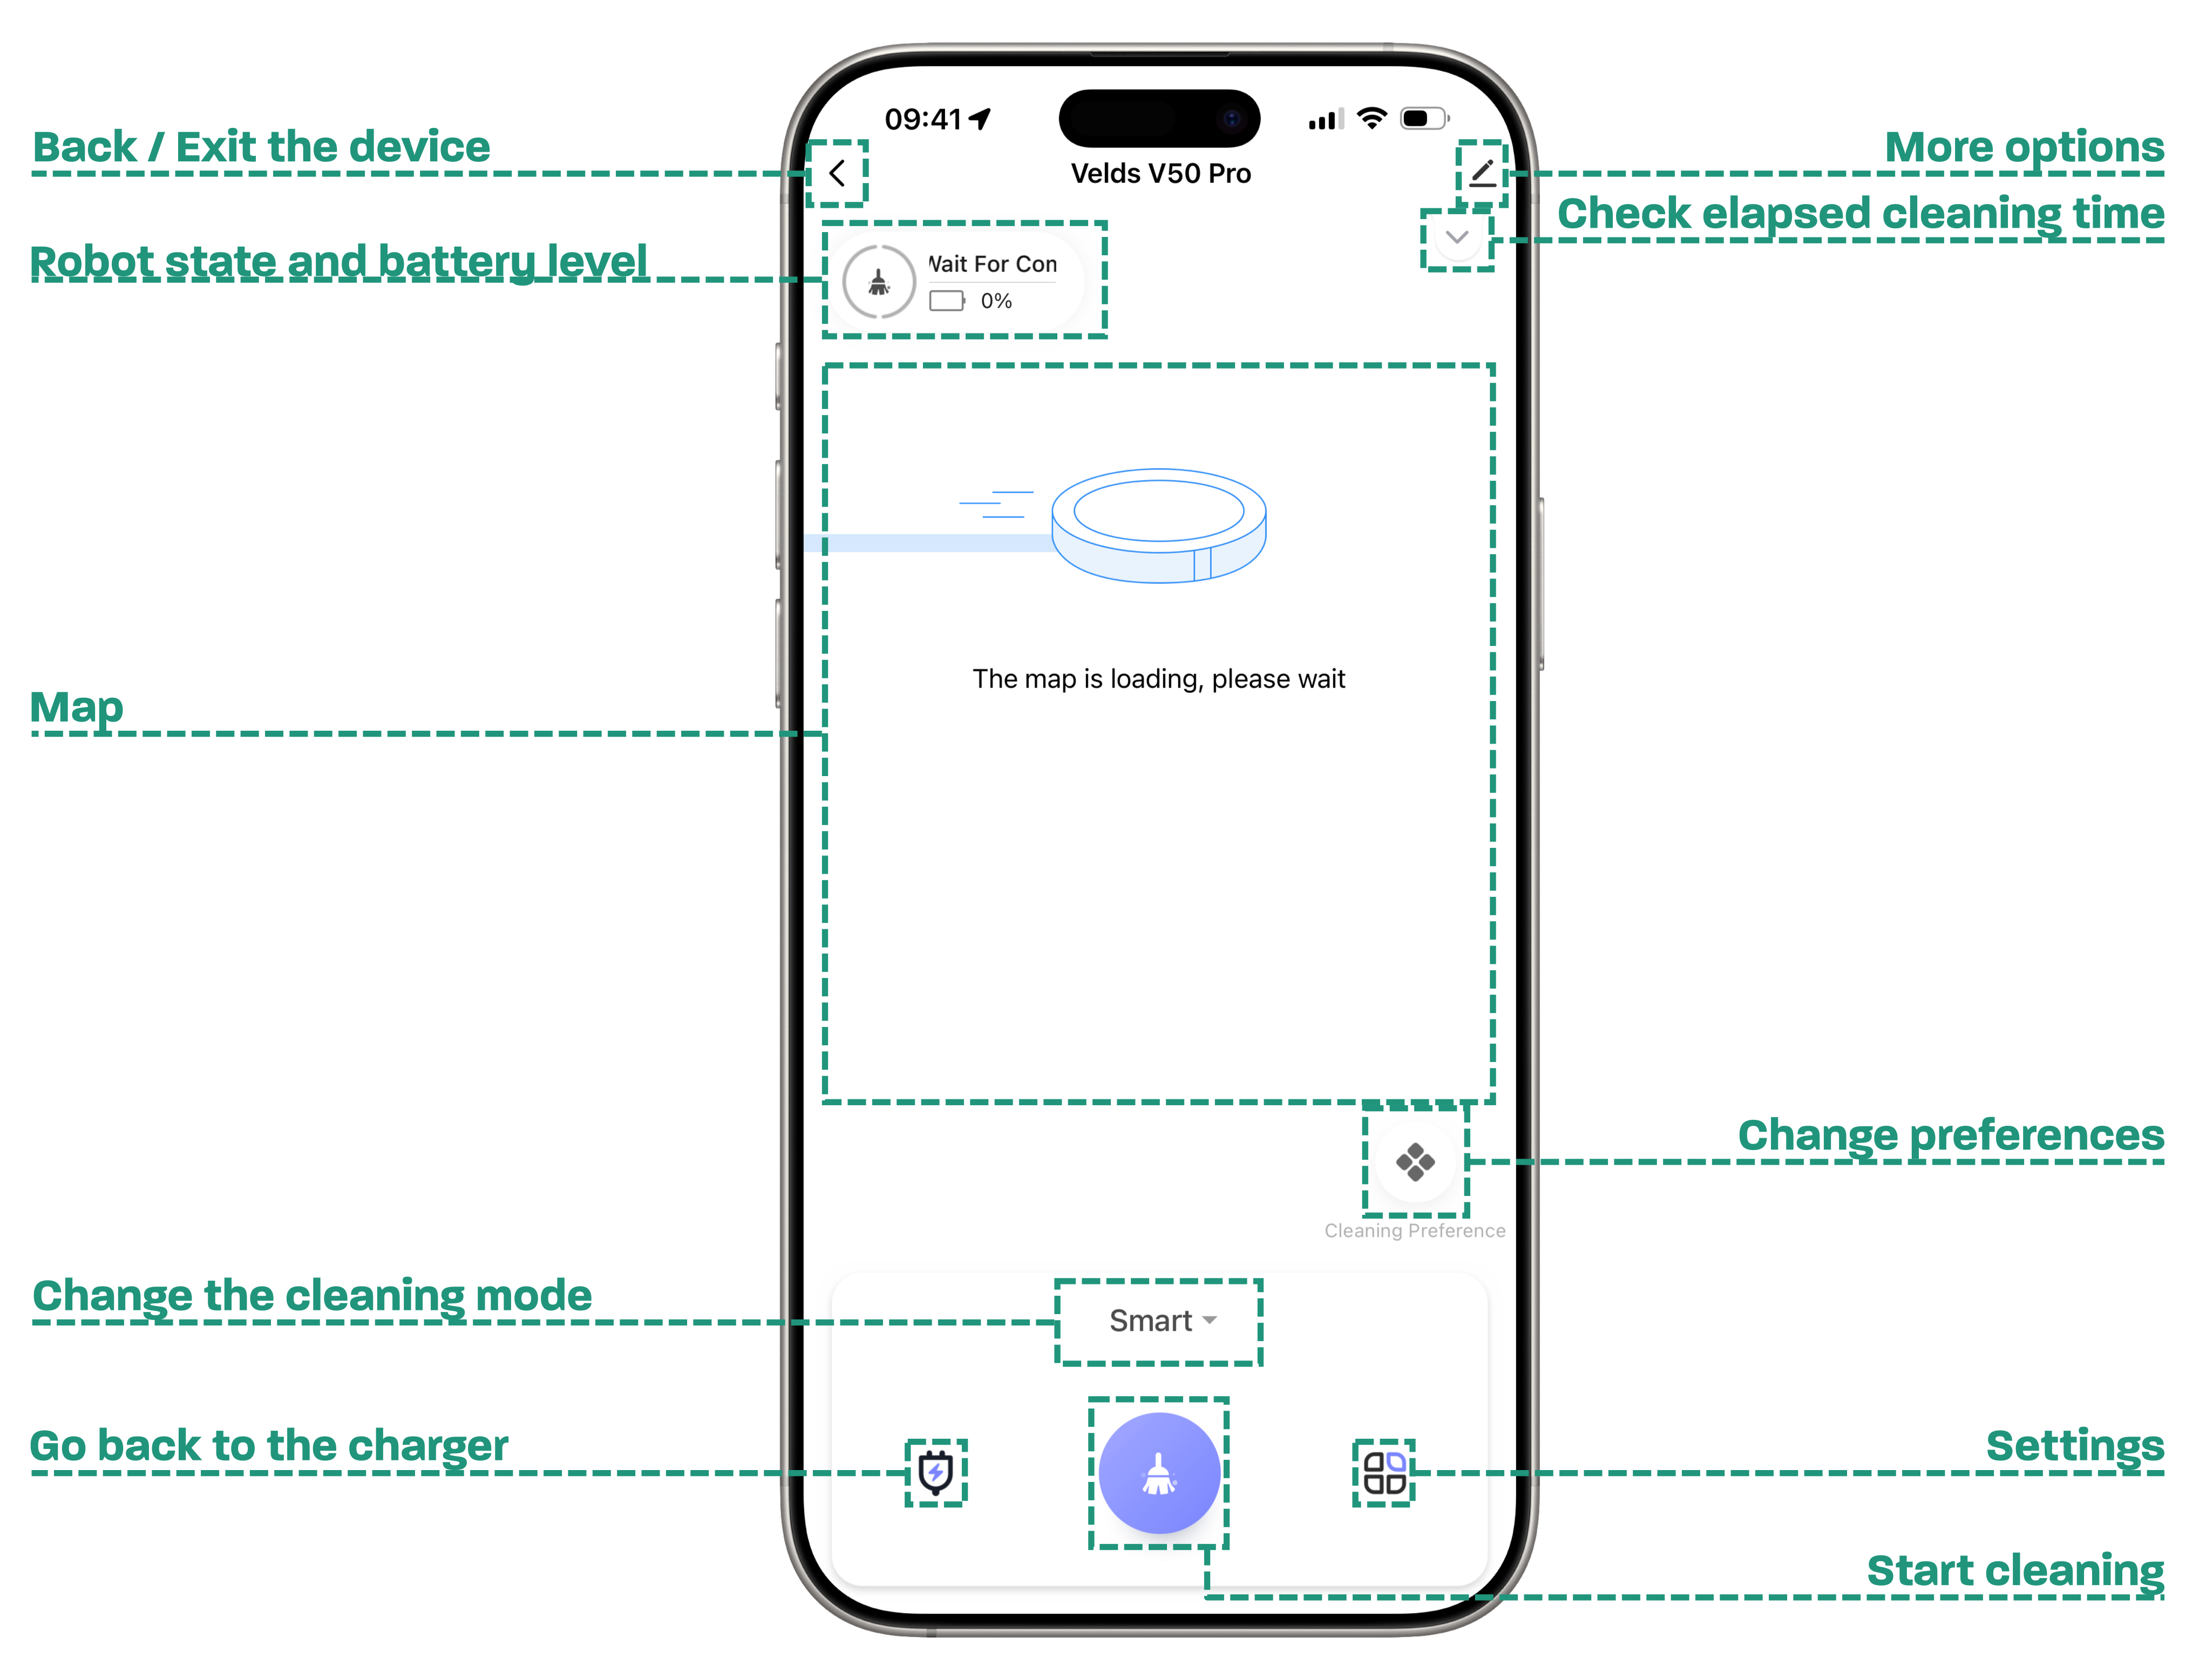
Main screen of the V50 PRO in the Velds app
Follow the robot status in real time and reach every function with a few taps.
Main screen of the V50 PRO in the Velds app
342561
1
Start or pause the robot
Pressing any mode button also wakes the robot.
2
Send the robot to the charging dock
3
The robot’s current map
4
Select the cleaning mode
5
Change the cleaning preferences
6
Open more options
History, maintenance, voice settings and more.
Main features available in the app
· Real-time map
· Zones and no-go areas
· Smart routines
· Firmware updates
· Cleaning modes
· Reports and history
· Maintenance status
Note
Some features may vary with the robot firmware version and the app version.
Velds V50 PRO | Quick Start Guide
20
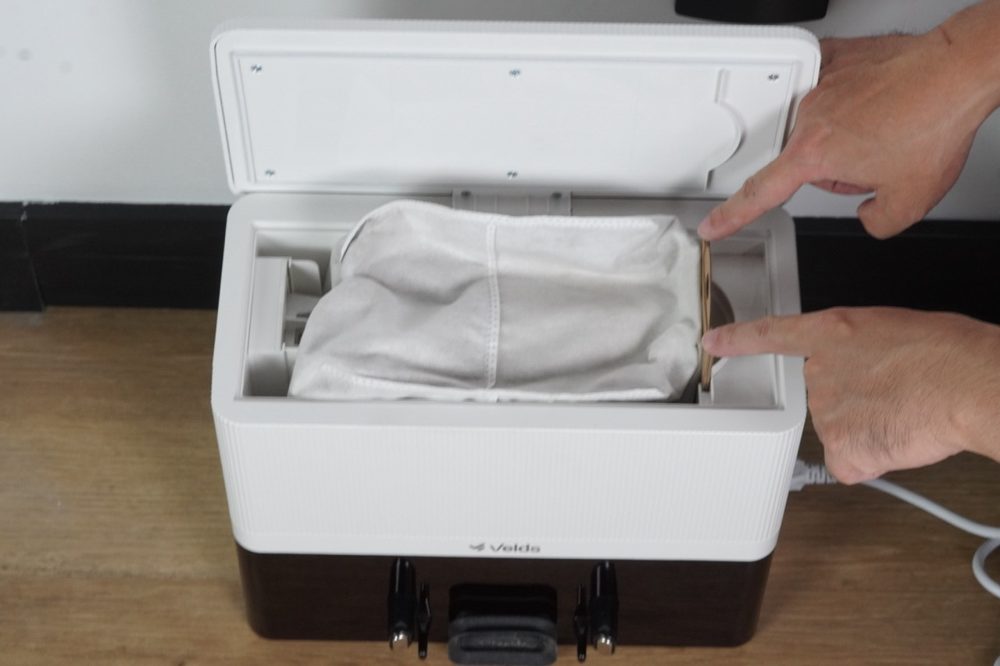
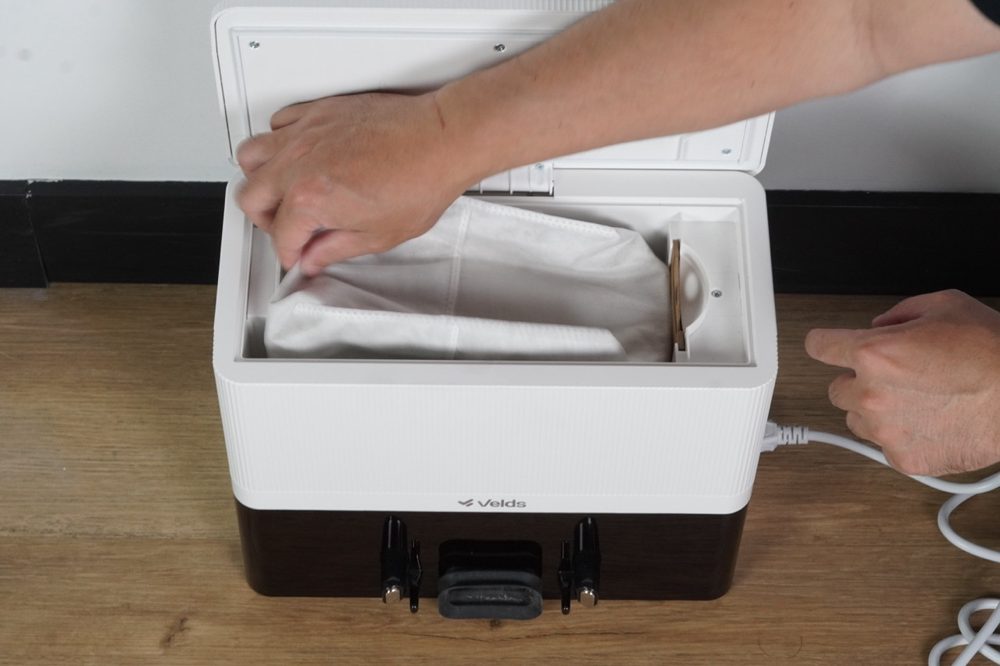
Replace the dust bag
Replace the bag when it is full or when the app notifies you.
01
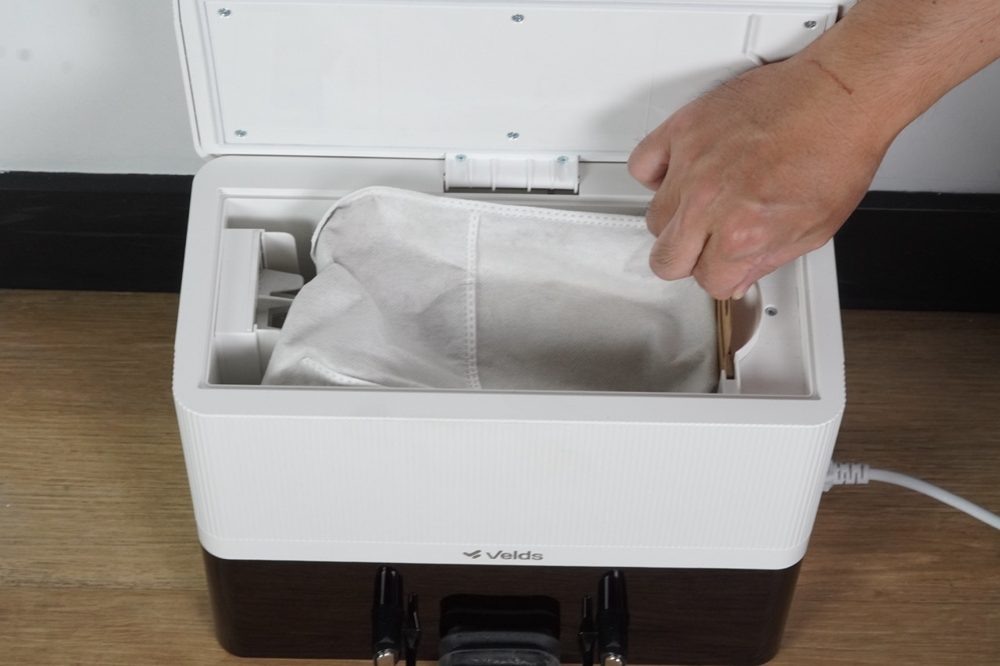
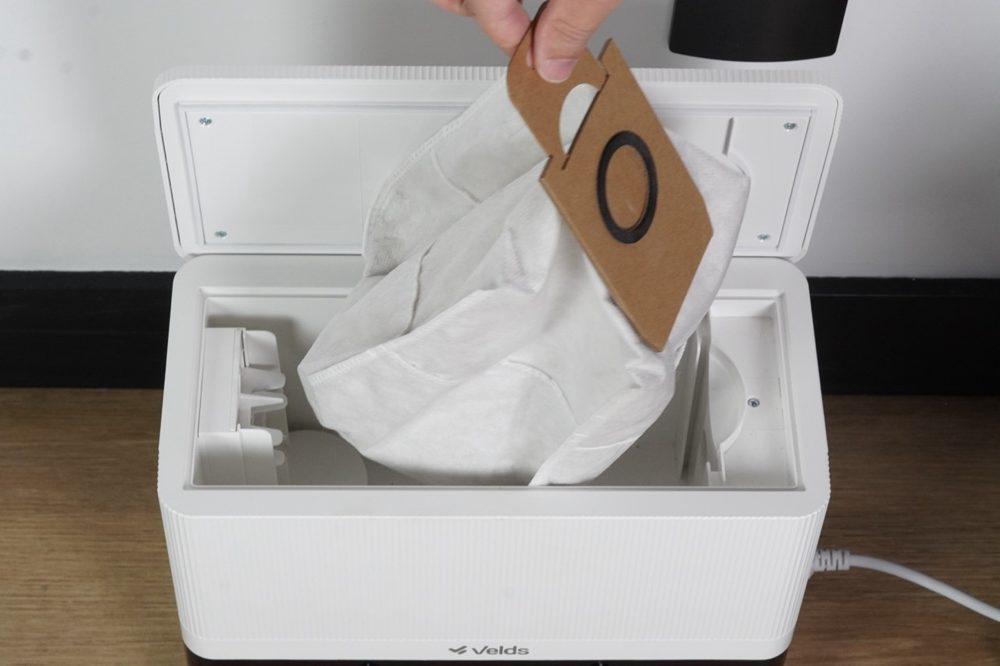
Open the dust box lid on the dock.
02
Pull the bag out by the cardboard tab. The seal closes automatically.
03
Holding the new bag by its tab, slide it into the holder.
04
Make sure the bag is properly seated inside of the dock.
05
Close the dust box lid.
Replace the dust bag - Close the dust box lid.
Tip
Use only genuine Velds dust bags and keep a spare on hand. Replacement bags are available directly from Velds.
Warning
Do not reuse or wash the dust bag. It is disposable.
Note
The seal closes as you pull the bag out, so the dust is not spread around the room.
Velds V50 PRO | Quick Start Guide
21
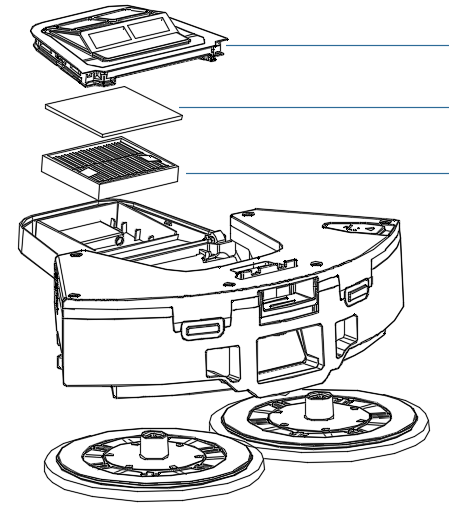
Care and maintenance — the 2-in-1 tank
Before any maintenance, turn the robot off and take it off the dock.
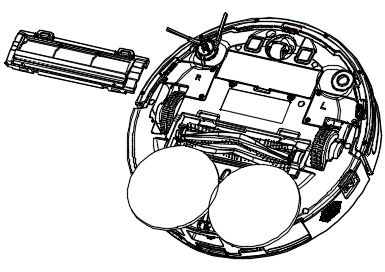
01
Remove the 2-in-1 tank and take the spinning mop pads off.
Frequency: After each use
02
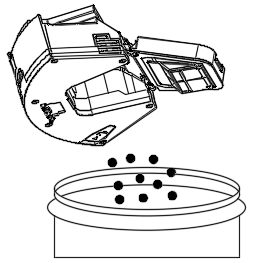
Open the dust compartment and empty it into the trash.
Frequency: Monthly
03
Use the cleaning tool on the corners that are harder to reach.
Frequency: Weekly
04
Take out the HEPA filter and the foam pre-filter.
Frequency: Weekly
05
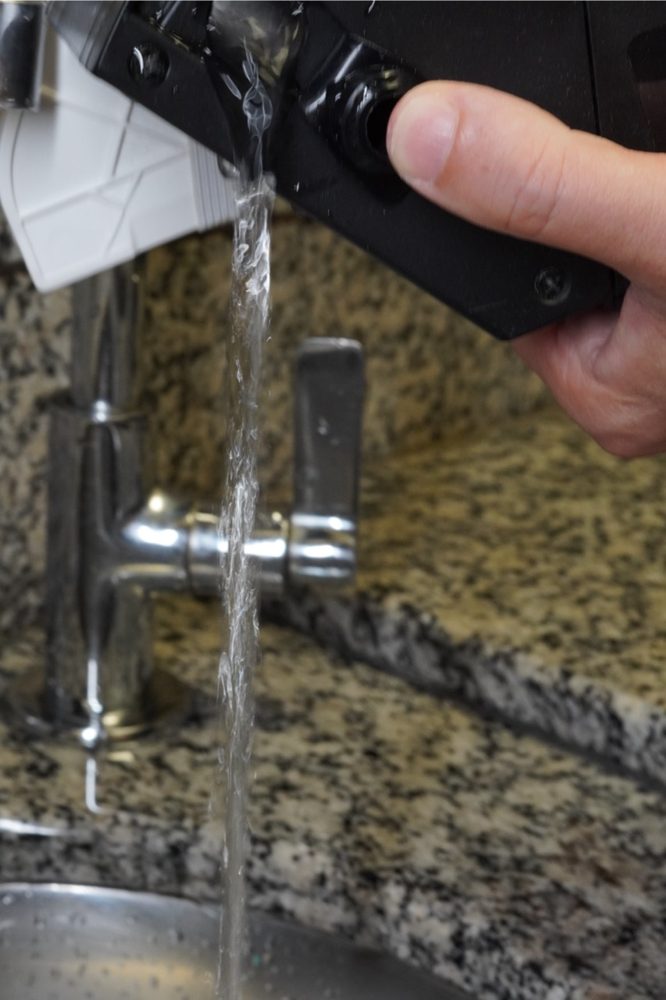
Care and maintenance — the 2-in-1 tank
Open the tank
06
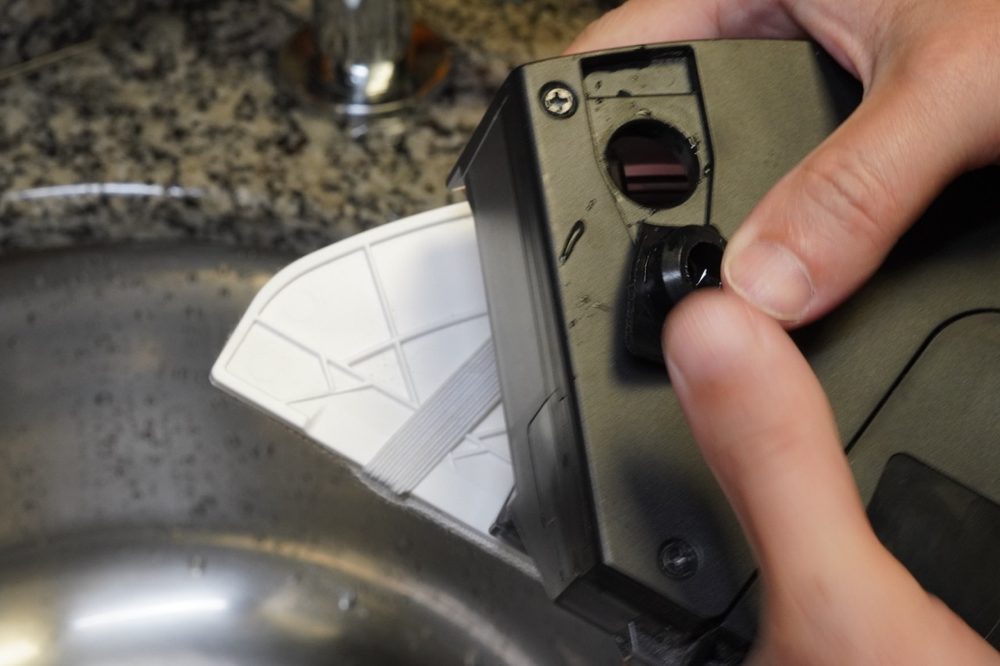
Care and maintenance — the 2-in-1 tank
Rinse the inside under running water
07
Care and maintenance — the 2-in-1 tank
Empty it completely and dry it
08
Care and maintenance — the 2-in-1 tank
Let every part dry in the shade
Filters
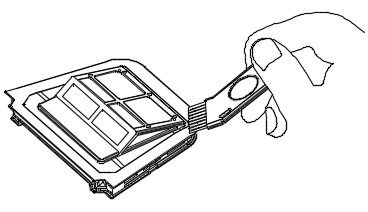
  • Tap the HEPA filter gently to knock the dust off. Do not wash the HEPA filter.
  • Wash only the foam pre-filter, under running water.
  • Let both parts dry completely before putting them back.
Mop pads
  • Wash with mild soap and rinse. Machine washing is allowed — no fabric softener.
  • Dry in the shade; do not use a tumble dryer.
  • If the robot will not be used for a day or more, take the pads off and let them air dry.
Velds V50 PRO | Quick Start Guide
22
Care and maintenance — brushes and wheels
Clear hair and fibers weekly to keep suction and traction at their best.
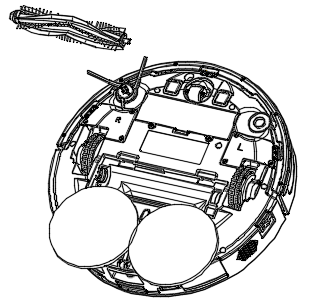
Main brush and side brushes
01
Pull the release tabs to unlock the brush cover.
Care and maintenance — brushes and wheels
Frequency: Weekly
02
Lift the main brush to remove it.
Care and maintenance — brushes and wheels
Frequency: Weekly
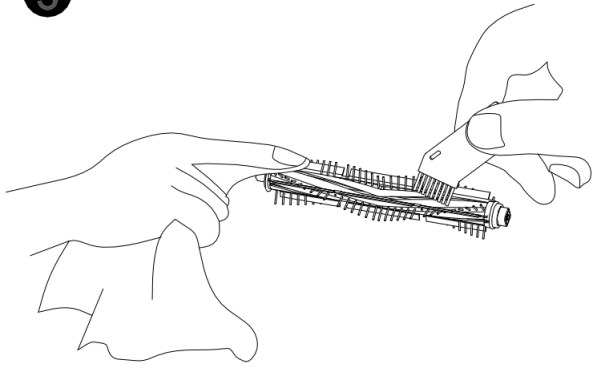
03
Clean the brush with the cleaning tool, removing hair and fibers.
Care and maintenance — brushes and wheels
Frequency: Weekly
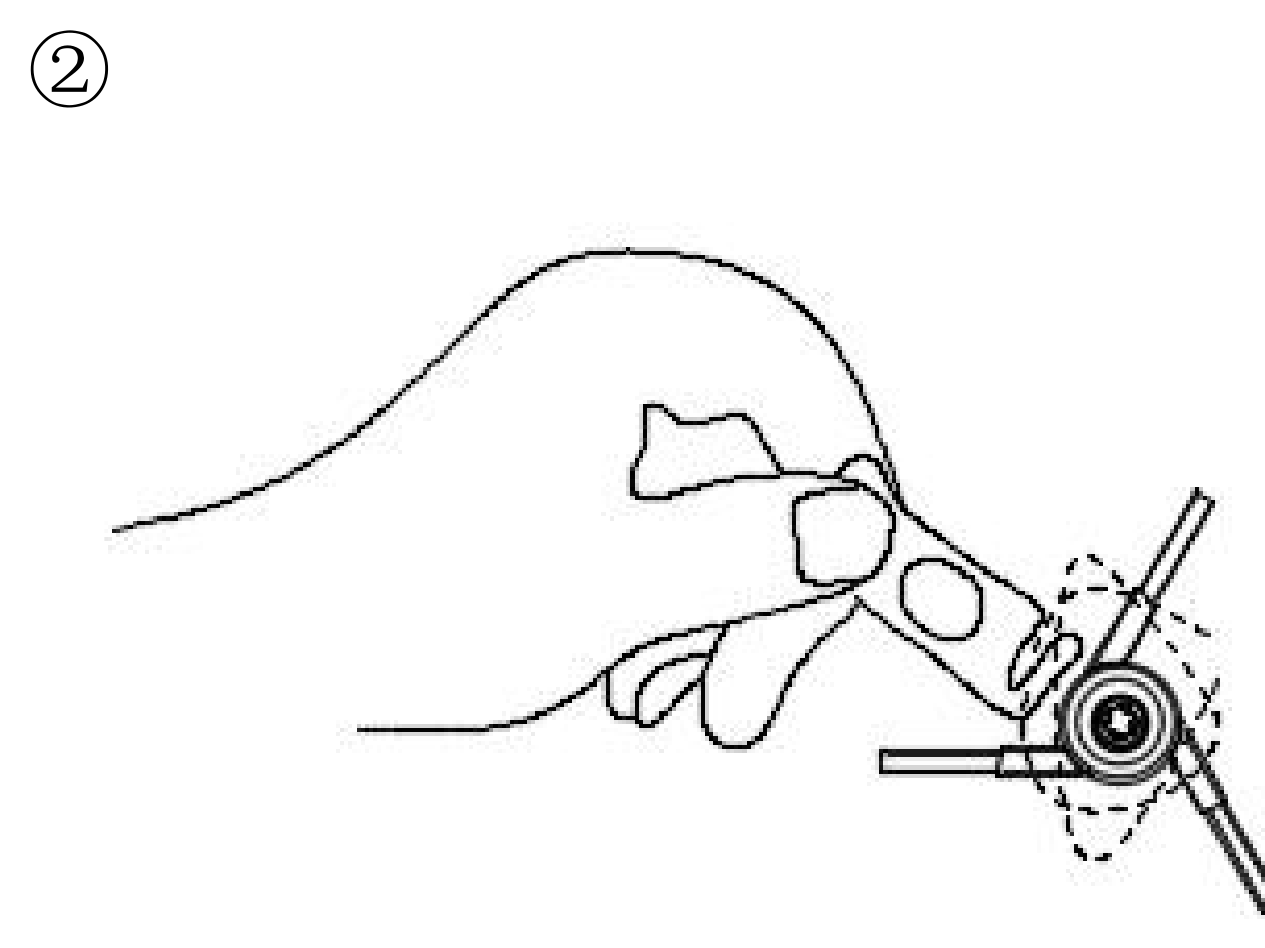
Side brushes
Care and maintenance — brushes and wheels
Pull to remove it
Care and maintenance — brushes and wheels
Clean the bristles and sockets, then reinstall
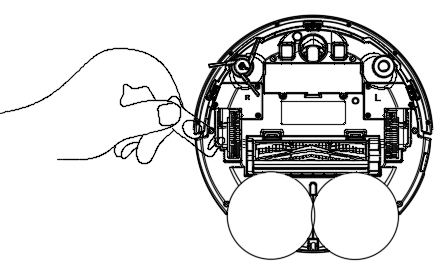
Wheels
Care and maintenance — brushes and wheels
Clean the main wheel
Care and maintenance — brushes and wheels
Clean the front wheel
Wheels
Use the cleaning tool to remove hair and debris, then wipe with a soft dry cloth. When a wheel is jammed, turn the gear in the opposite direction to loosen the dirt.
Tip
The cleaning tool supplied in the box makes it easier to remove threads and hair from the brushes and wheels.
Velds V50 PRO | Quick Start Guide
23
Care and maintenance — other components
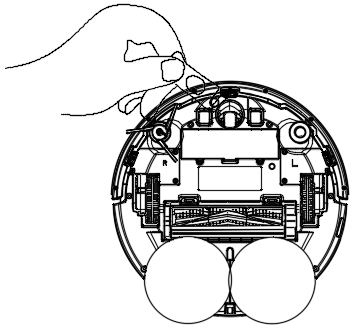
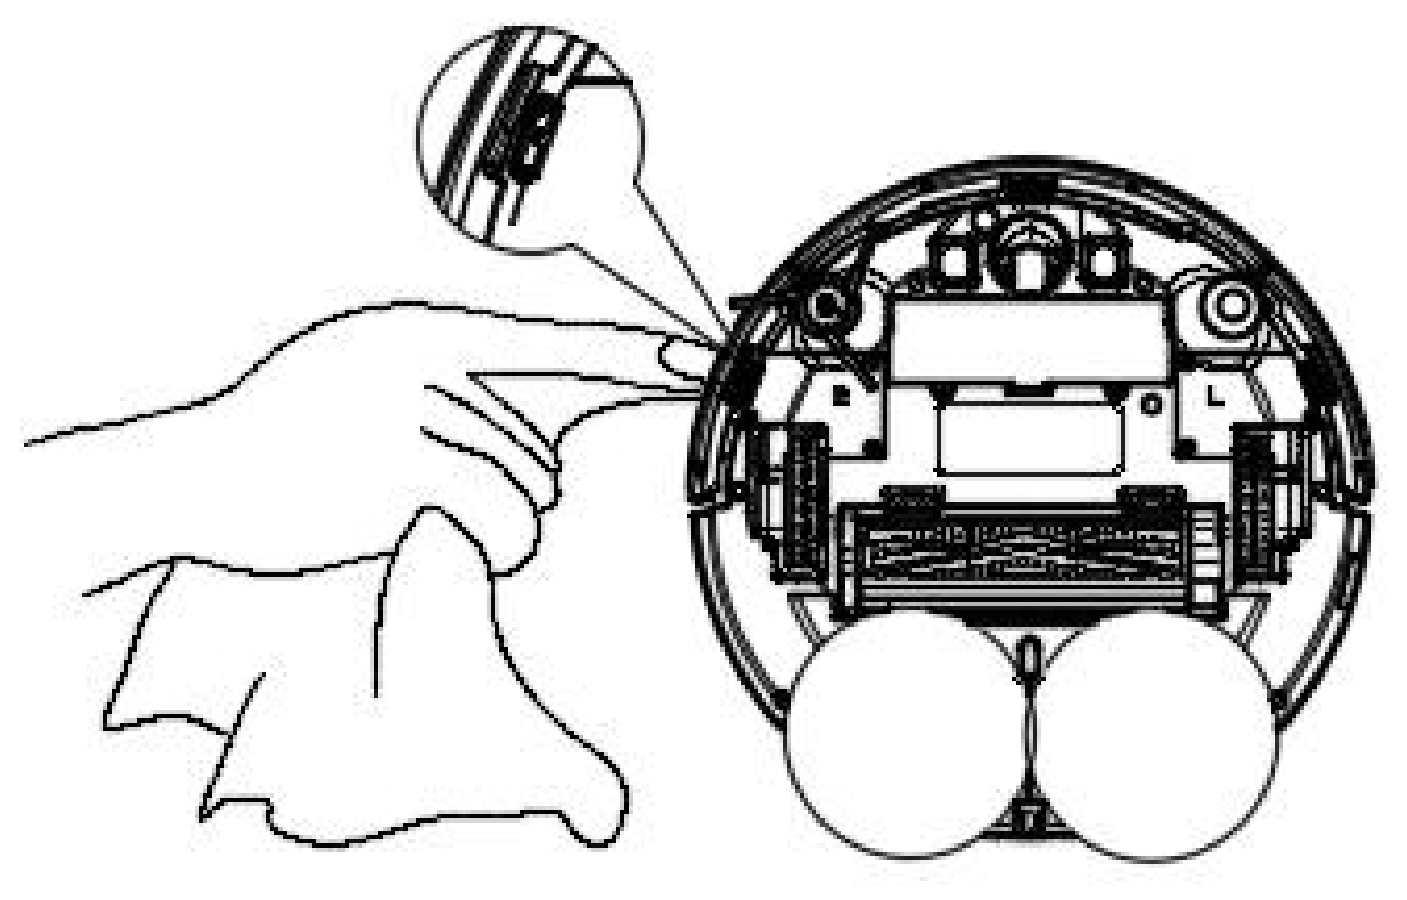
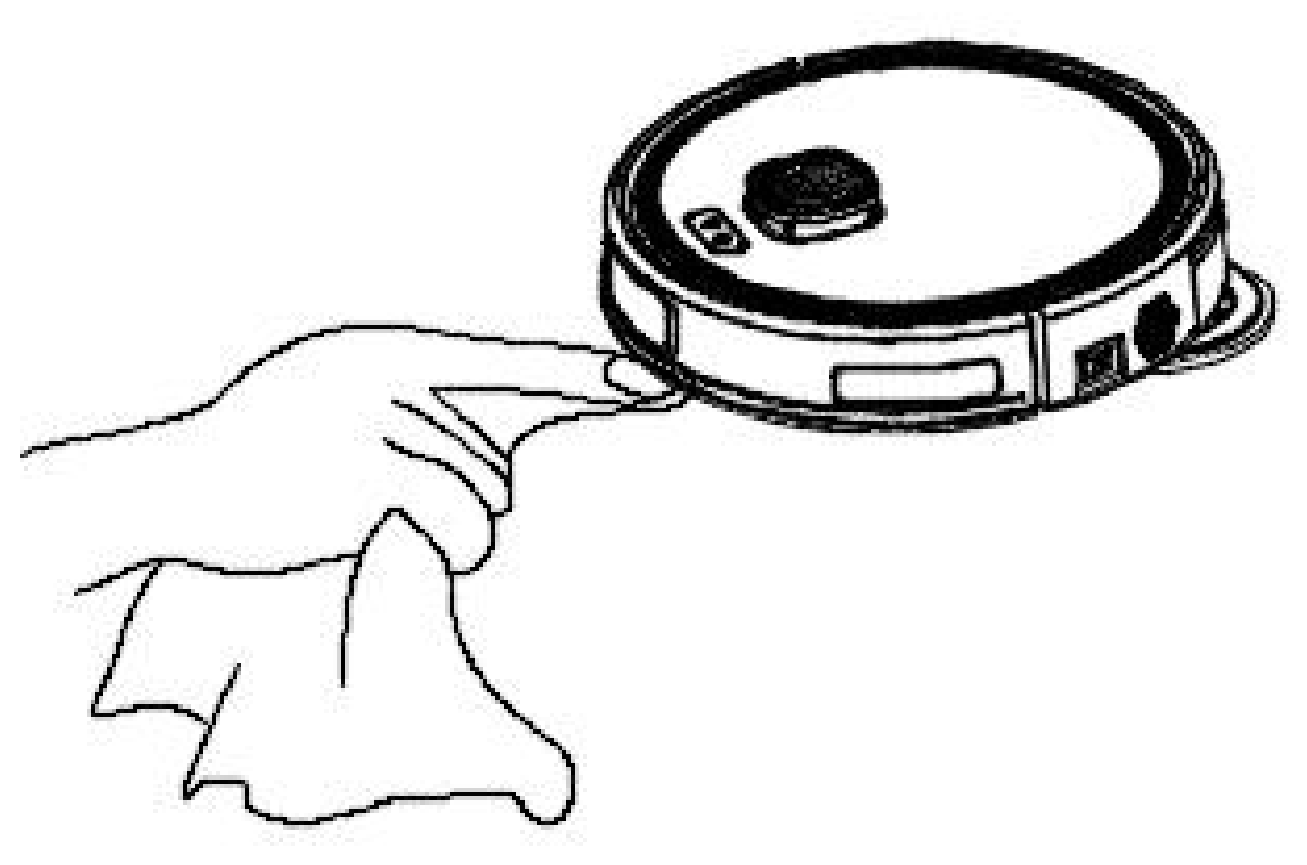
Sensors, contacts and the dock need a dry cloth only.
Care and maintenance — other components
Clean the anti-drop sensors
Care and maintenance — other components
Clean the bumper
Tip
The charging contacts and the anti-drop sensors contain sensitive electronic components. Use a dry cloth, not a damp one, to avoid water damage.
Periodically
Clean the charging contacts, both on the robot and on the dock, with a soft dry cloth.
Clean the robot’s anti-drop sensors and bumper with a soft dry cloth. Do not use chemicals.
To clean the laser sensor on top of the robot, you can use cotton swabs.
Keep the dock in a dry, ventilated place and clean it with a dry cloth. Do not let dust build up on the charging pins or on the infrared sensor.
Use only Velds-approved accessories and spare parts.
Warning
Never wash the robot, the dock or the power supply. Dry every part completely before putting it back.
Before any maintenance
Turn the robot off and take it off the dock.
Velds V50 PRO | Quick Start Guide
24
Maintenance schedule and consumables
Intervals may vary with how much you use the robot and with the environment.

The Maintenance tab in the Velds app also tracks the wear status of the consumables and tells you when to replace them.

ComponentWhat to do
Dust compartmentEmpty it after each use
2-in-1 tankEmpty after each use; wash the inside under running water and dry it
Foam pre-filterWash under running water, weekly
HEPA filterTap it to remove the dust, monthly. Do not wash it
Main brushRemove the cover, take the brush out and clear hair and fibers, weekly
Side brushesRemove, clear hair and fibers from bristles and sockets, weekly
ComponentWhat to do
Mop pads and holdersWash with mild soap after each use, dry in the shade, check the fastener
Wheels and sensorsWipe with a soft dry cloth, weekly. No chemicals
Charging contactsWipe the robot and dock contacts with a soft dry cloth, weekly
Dust bagReplace when full or when the app notifies you. Do not wash or reuse
DockDry, ventilated place; dry cloth; keep the pins and infrared sensor free of dust, weekly
BatteryKeep the robot charged; if unused for long periods, charge it every 3 months
After every cleaning
  • Empty the dust compartment.
  • Empty the water tank.
  • Remove and wash the mop pads.
  • Let every part dry before reassembling.
Consumables
Use only genuine Velds filters, brushes, mop pads and dust bags. Non-approved parts can reduce suction and void the warranty on the affected components.
Velds V50 PRO | Quick Start Guide
25
Safety warnings
Read all the instructions before using your V50 PRO.

Read this manual carefully before using the V50 PRO and keep it for future reference. Failing to follow these instructions may cause damage to the product, damage to property or injury.

This appliance is not intended for use by persons, including children, with reduced physical, sensory or mental capabilities, or lacking experience and knowledge, unless they have been instructed or are supervised by someone responsible for their safety. Children should be supervised to ensure they do not play with the appliance.

Indoor use only
Dry indoor floors in residential environments only. Not for outdoor or industrial areas.
No wet floors
Do not use on wet floors, in wet areas or near flammable materials. The robot is not waterproof.
No direct sunlight
Keep the robot and the dock away from heat sources and out of prolonged direct sunlight.
Other Power Cables
Use only the power supply provided. Do not use the adapter if the plug or cord is damaged.
Keep out of reach of young children
Moving brushes
Keep your hands and any objects away from the brushes while they are moving.
Do not disassemble
Disassembling or modifying the device or its accessories without authorization voids the warranty.
Unplug in storms
During electrical storms, unplug the dock from the outlet. Move the dock carefully.
Velds V50 PRO | Quick Start Guide
26
Safety warnings — full list
The items below complement the warnings on the previous page.
1
Install the product according to the instructions given in this manual.
2
The power outlet must be installed near the device and be easily accessible.
3
Keep the device away from water, fire, strong electric fields, strong magnetic fields, and flammable or explosive items.
4
Do not use the power adapter if the plug or cord is damaged. If the power cord is damaged, take it to an authorized service center.
5
Use the appliance only with the power supply provided by the manufacturer. Other power supplies may cause safety risks or damage.
6
The equipment must be powered only by safety extra-low voltage (SELV), in accordance with the values on the product rating label.
7
If smoke, abnormal noise or abnormal smell occur while in use, stop immediately, disconnect the power supply, unplug all cables and contact after-sales service.
8
Disassembling or modifying the device or its accessories without authorization will void the warranty and may create safety risks.
9
The product must not be used by young children, or by persons with reduced capabilities, without supervision.
Keep this guide
Keep this guide for future reference. The warning items in other documents are supplementary and do not cover every precaution that must be followed.
10
Supervise children and pets while the robot is operating.
11
Do not use the robot on wet floors, in wet areas or near flammable materials.
12
Keep the robot away from heat sources and out of direct sunlight. Keep your hands and any objects away from the brushes while they are moving.
13
Fall risk: in dark areas or on reflective surfaces, sensor detection may fail. Use physical barriers at stairs and drop-offs.
14
During electrical storms, unplug the dock from the outlet. Move the dock carefully.
15
Before any maintenance, turn the robot off and take it off the dock.
16
Intended use: dry indoor floors in residential environments only.
17
Dispose of the product, the battery and their packaging in accordance with local law, at appropriate and authorized collection points.
Warning
Improper use of the robot may cause damage that is not covered by the warranty. Always use the product as described in this manual.
Velds V50 PRO | Quick Start Guide
27
Troubleshooting
Before contacting Velds support, check the situations below. Many problems have simple fixes.

When the robot detects a problem, the status LED blinks red and the robot announces the occurrence with a voice message. Listen to the spoken message and follow the instruction.

SituationWhat to do
Does not turn onCharge the robot on the dock and check that the side switch is in the on position.
Does not charge on the dockConfirm the dock is powered and clean the charging contacts of the robot and the dock with a soft dry cloth. Reposition the robot and check that the contacts are aligned.
Does not connect to the appConfirm the network is 2.4GHz — 5GHz is not supported. Check that the Wi-Fi LED is blinking, move the phone closer to the robot and restart the robot.
Weak suctionEmpty the dust compartment, clean the foam pre-filter and tap the HEPA filter. Check that the main brush and the suction duct are not obstructed.
Main brush does not turnRemove the brush cover, take the brush out and clear hair and fibers with the cleaning tool, then reinstall it correctly.
Side brushes do not turnRemove the brushes, clear hair and fibers from the bristles and sockets, refit until they click and replace them if damaged.
Does not release waterFill the 2-in-1 tank, check that the silicone lid is fully closed and that the water outlets are not obstructed.
Gets stuck during cleaningRemove cords, rugs and obstacles. Thresholds over 2 cm may block the robot.
Robot slips or does not move wellClean the main and front wheels and remove hair and debris. If a wheel is jammed, turn the gear in the opposite direction.
Mop pads leave marks or do not cleanCheck that the pads are damp and correctly installed, and that the floor is a smooth sealed surface. See section 16.
Does not return to the dockCheck that the dock is powered, in its original position and with the required clearance around it. Clean the charging contacts.
Robot cannot find the dockClean the LiDAR sensor on top of the robot with a dry cotton swab and keep the area around the dock clear.
The map is incomplete or a new map appearsConfirm the dock has not been moved and the cleaning started from it. Open all doors, remove temporary obstacles and run a full cleaning with the battery charged.
Before contacting support, check that
  • The robot is charged and switched on.
  • The dust compartment and the filter are clean.
  • The 2.4GHz Wi-Fi network is stable.
  • The water tank is filled.
  • The mop pads are correctly installed.
Still not working?
If the problem persists, contact Velds support at [email protected] with your model, serial number and a short description of the issue.
Velds V50 PRO | Quick Start Guide
28
Frequently asked questions
Answers to the most common questions about the V50 PRO.
Online FAQ
Setup, pairing and Wi-Fi troubleshooting
Cleaning modes, zones and no-go areas
Filters, mop pads, dust bags and spare parts
Firmware updates and app features
velds.us/faq
QR code for the Velds FAQ page
Support
For anything the FAQ does not cover, contact Velds support at [email protected]. Have your model and serial number ready.
Tip
The full online manual for the V50 PRO, with every step illustrated, is available on the Velds website.
29
Terms and policies
Warranty, returns and privacy.
Where to find the full terms
Limited warranty coverage and duration
Returns, exchanges and the right of withdrawal
What is excluded from warranty coverage
velds.us/manuals/velds-terms-and-policies
Keep your proof of purchase
Warranty service requires the original proof of purchase. Keep your invoice or order confirmation in a safe place.
FAQ and manuals
velds.us/faq
Spare parts and accessories
velds.us
Model
Velds V50 PRO
Velds V50 PRO | Quick Start Guide
Thank you for choosing Velds.
Velds V50 PRO · Quick Start Guide · Version 1.2
velds.us · [email protected]